THE RING LORD · LEARN & CREATE

Scalemaille 101

An illustrated beginner’s guide to scalemaille by Thomas & Jennifer Kreyl of AC5 Chainmaille.

Start learningView original PDF

Introduction & Quality

Original tutorial · Page 1 of 37
Scalemaille 101 original illustrated instruction page 1
Read searchable text for page 1

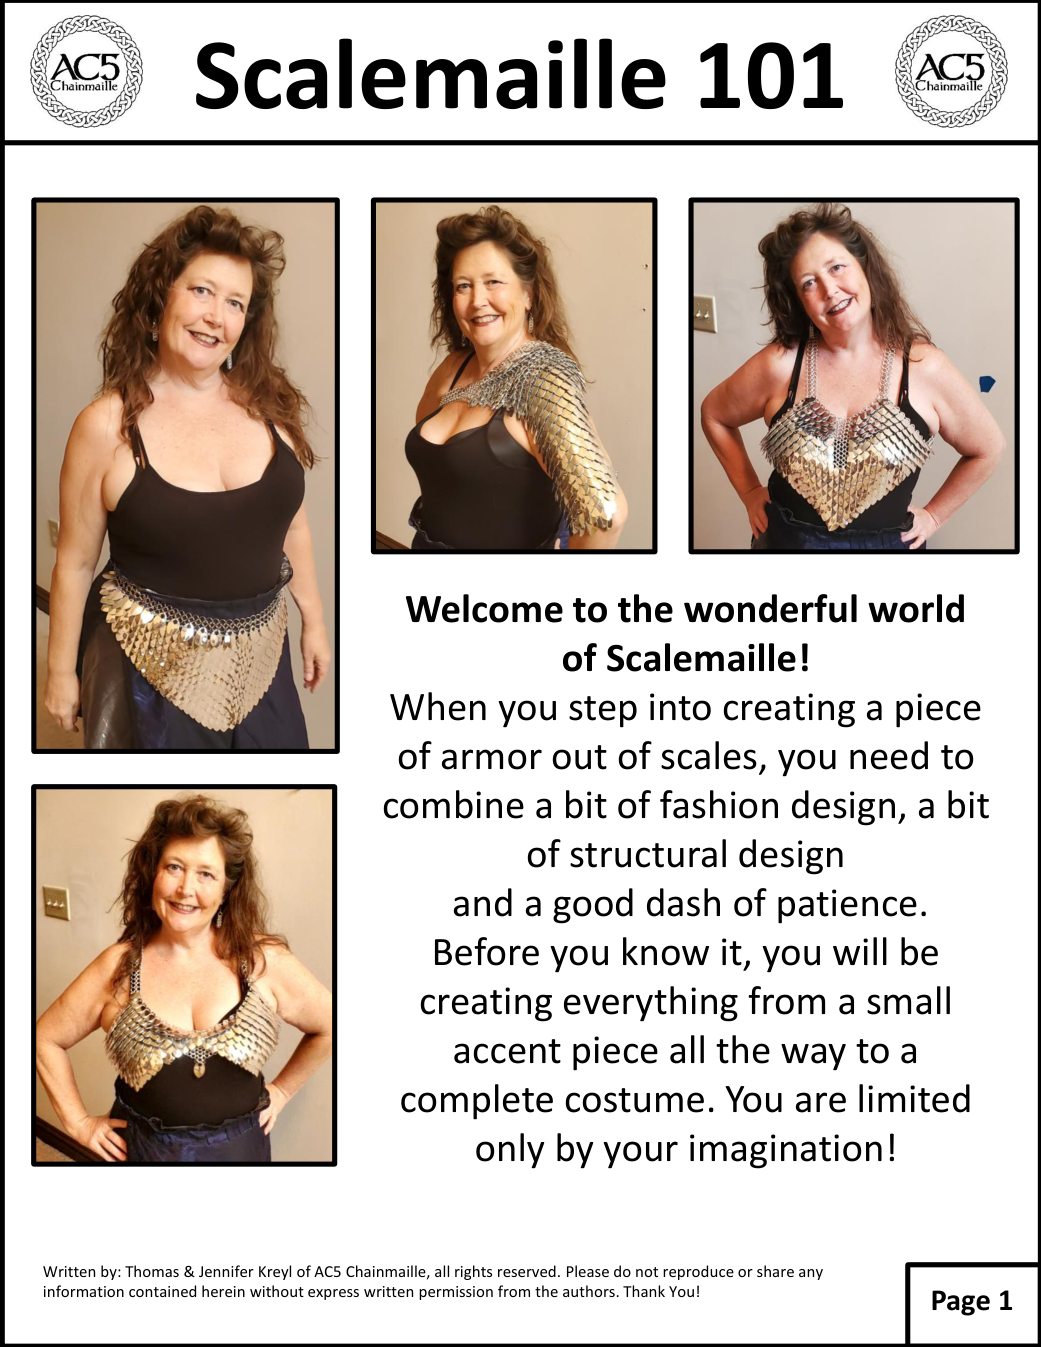
Welcome to the wonderful world of Scalemaille! When you step into creating a piece of armor out of scales, you need to combine a bit of fashion design, a bit of structural design and a good dash of patience. Before you know it, you will be creating everything from a small accent piece all the way to a complete costume. You are limited only by your imagination!
Original tutorial · Page 2 of 37
Scalemaille 101 original illustrated instruction page 2
Read searchable text for page 2

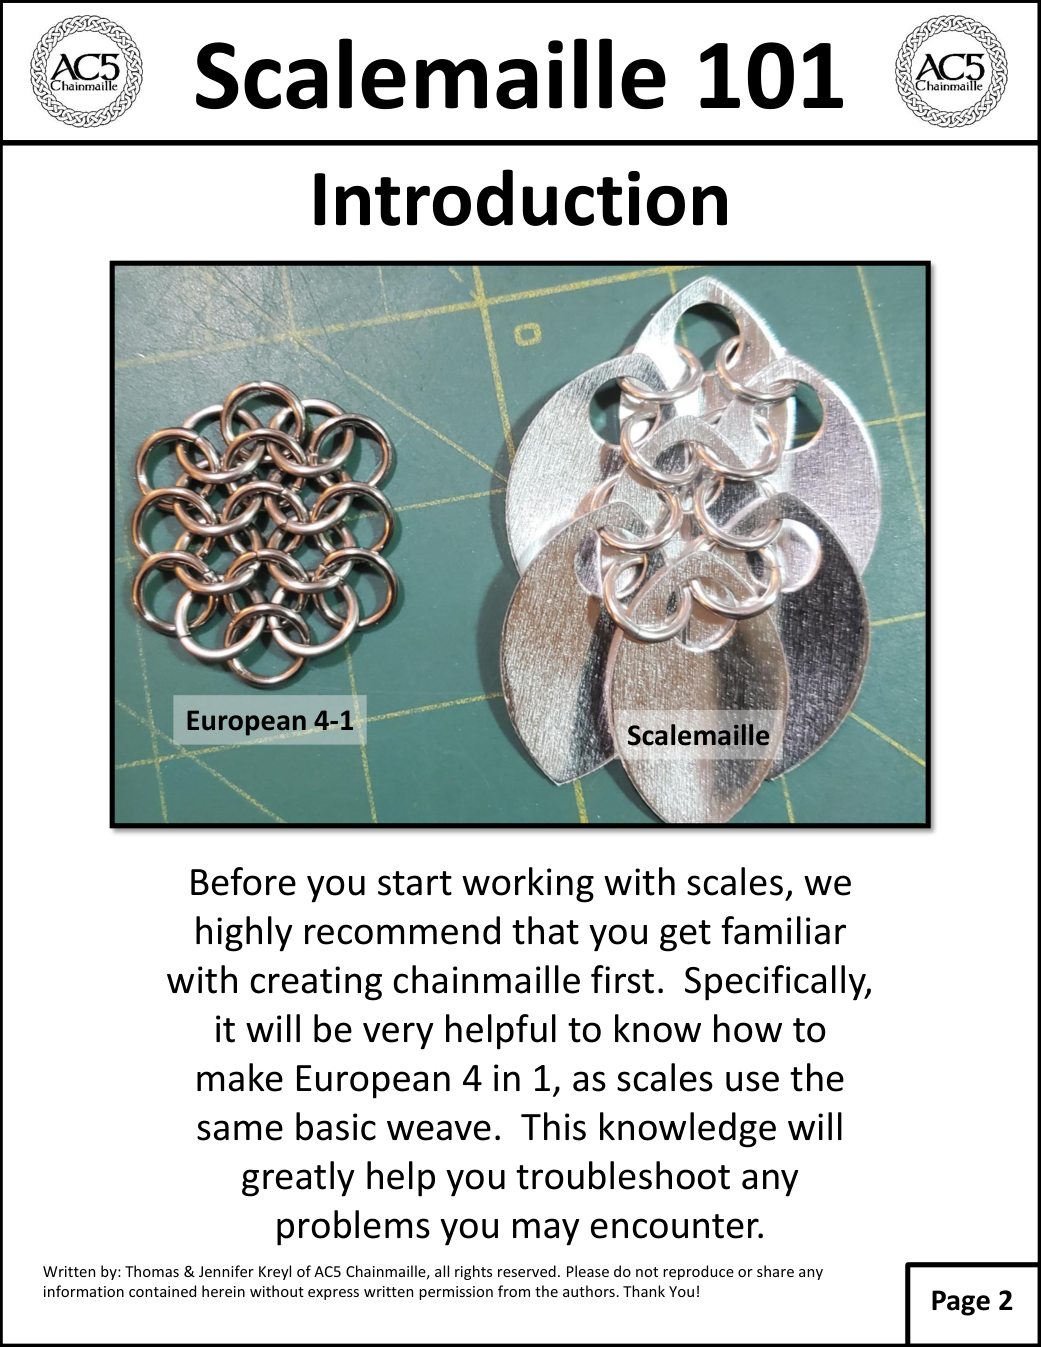
Introduction European 4-1 Scalemaille Before you start working with scales, we highly recommend that you get familiar with creating chainmaille first. Specifically, it will be very helpful to know how to make European 4 in 1, as scales use the same basic weave. This knowledge will greatly help you troubleshoot any problems you may encounter.

Original tutorial · Page 3 of 37
Scalemaille 101 original illustrated instruction page 3
Read searchable text for page 3

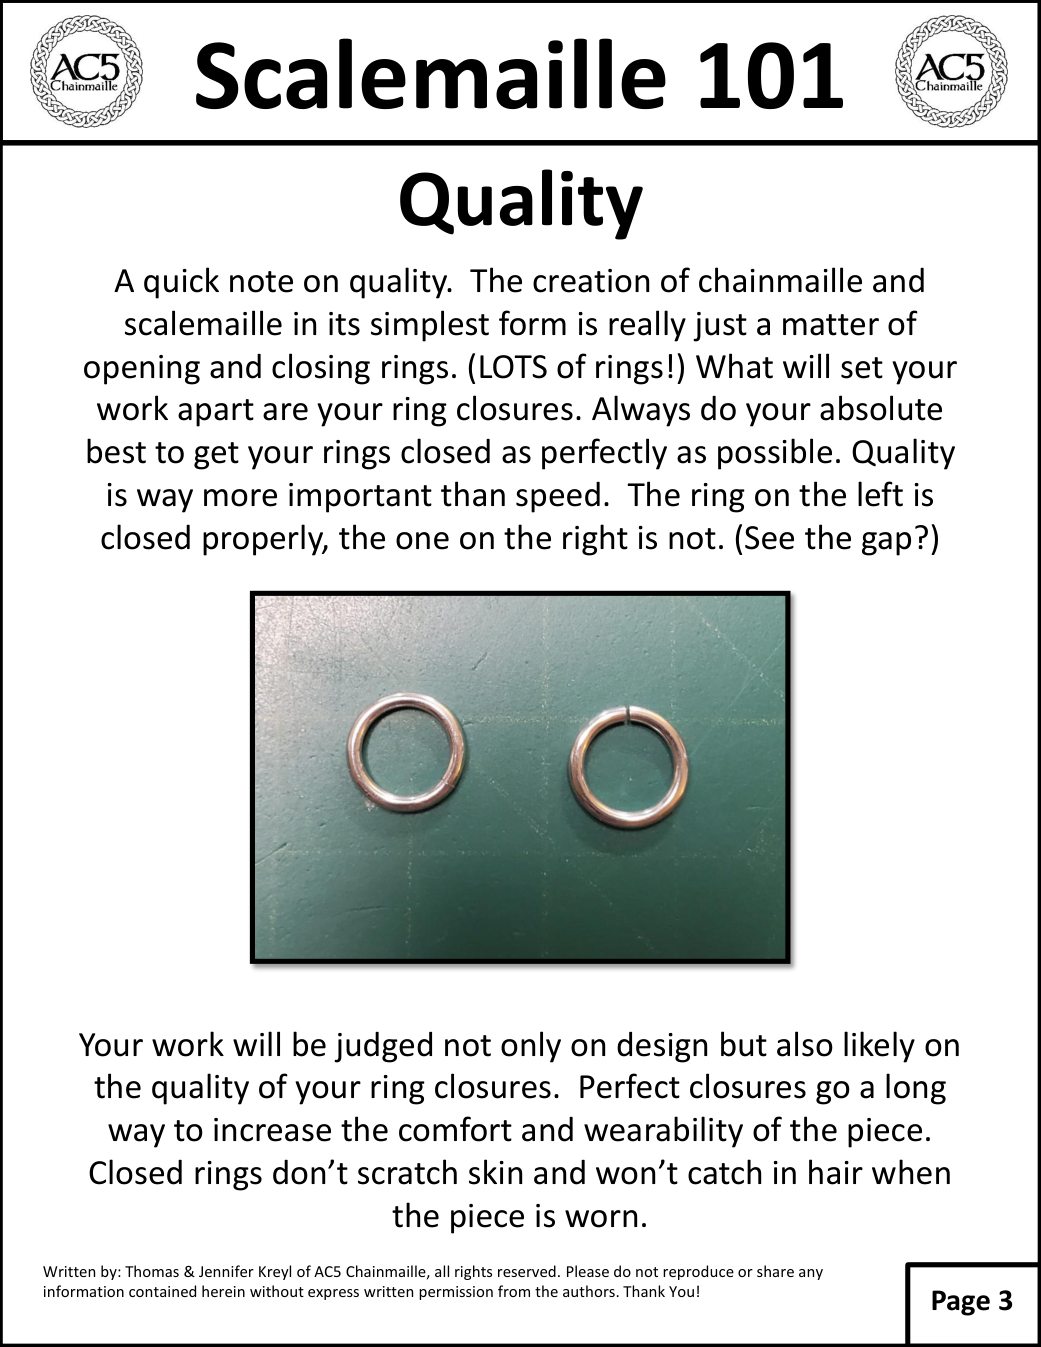
Quality A quick note on quality. The creation of chainmaille and scalemaille in its simplest form is really just a matter of opening and closing rings. (LOTS of rings!) What will set your work apart are your ring closures. Always do your absolute best to get your rings closed as perfectly as possible. Quality is way more important than speed. The ring on the left is closed properly, the one on the right is not. (See the gap?) Your work will be judged not only on design but also likely on the quality of your ring closures. Perfect closures go a long way to increase the comfort and wearability of the piece. Closed rings don’t scratch skin and won’t catch in hair when the piece is worn.

↑ Back to tutorial contents

Tools & Equipment

Original tutorial · Page 4 of 37
Scalemaille 101 original illustrated instruction page 4
Read searchable text for page 4

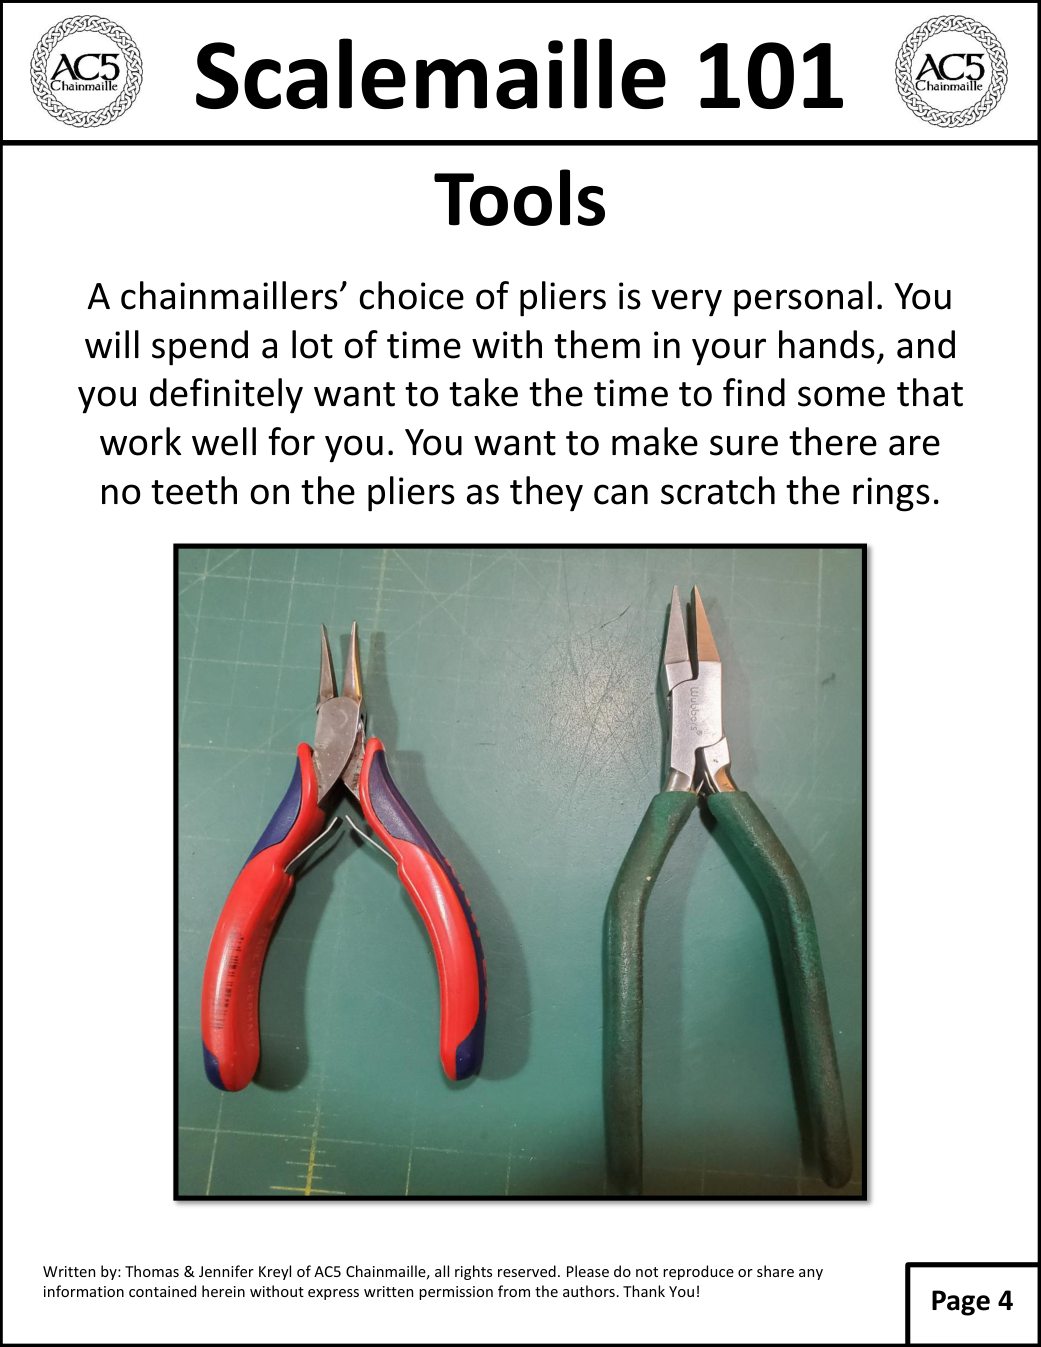
Tools A chainmaillers’ choice of pliers is very personal. You will spend a lot of time with them in your hands, and you definitely want to take the time to find some that work well for you. You want to make sure there are no teeth on the pliers as they can scratch the rings.

Original tutorial · Page 5 of 37
Scalemaille 101 original illustrated instruction page 5
Read searchable text for page 5

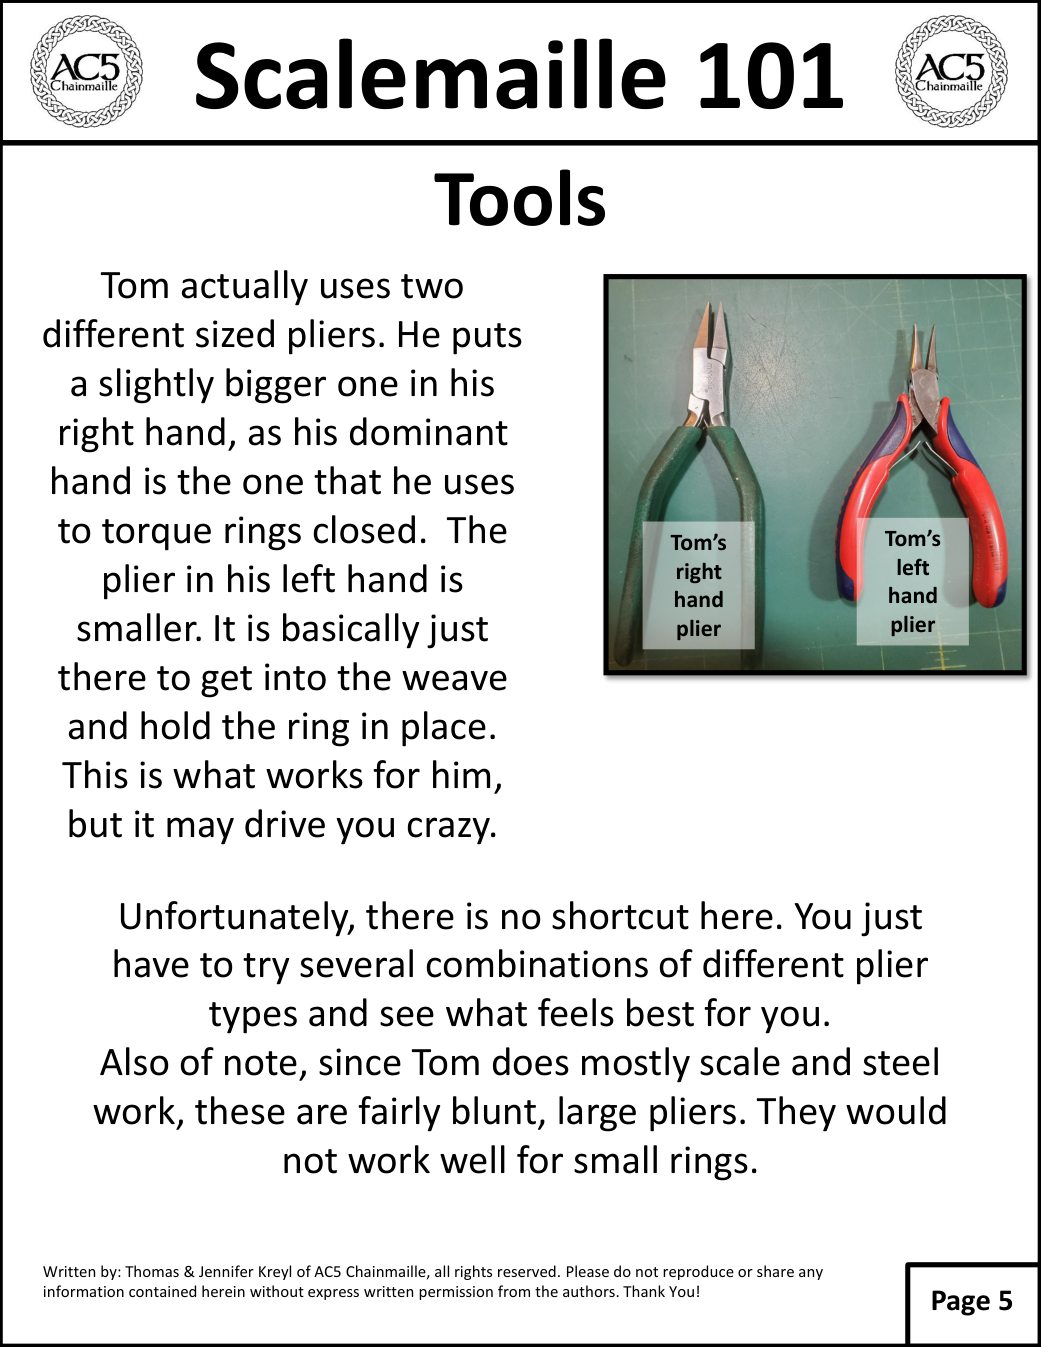
Tools Tom actually uses two different sized pliers. He puts a slightly bigger one in his right hand, as his dominant hand is the one that he uses to torque rings closed. The Tom’s right hand Tom’s left hand plier in his left hand is smaller. It is basically just there to get into the weave plier plier and hold the ring in place. This is what works for him, but it may drive you crazy. Unfortunately, there is no shortcut here. You just have to try several combinations of different plier types and see what feels best for you. Also of note, since Tom does mostly scale and steel work, these are fairly blunt, large pliers. They would not work well for small rings.

Original tutorial · Page 6 of 37
Scalemaille 101 original illustrated instruction page 6
Read searchable text for page 6

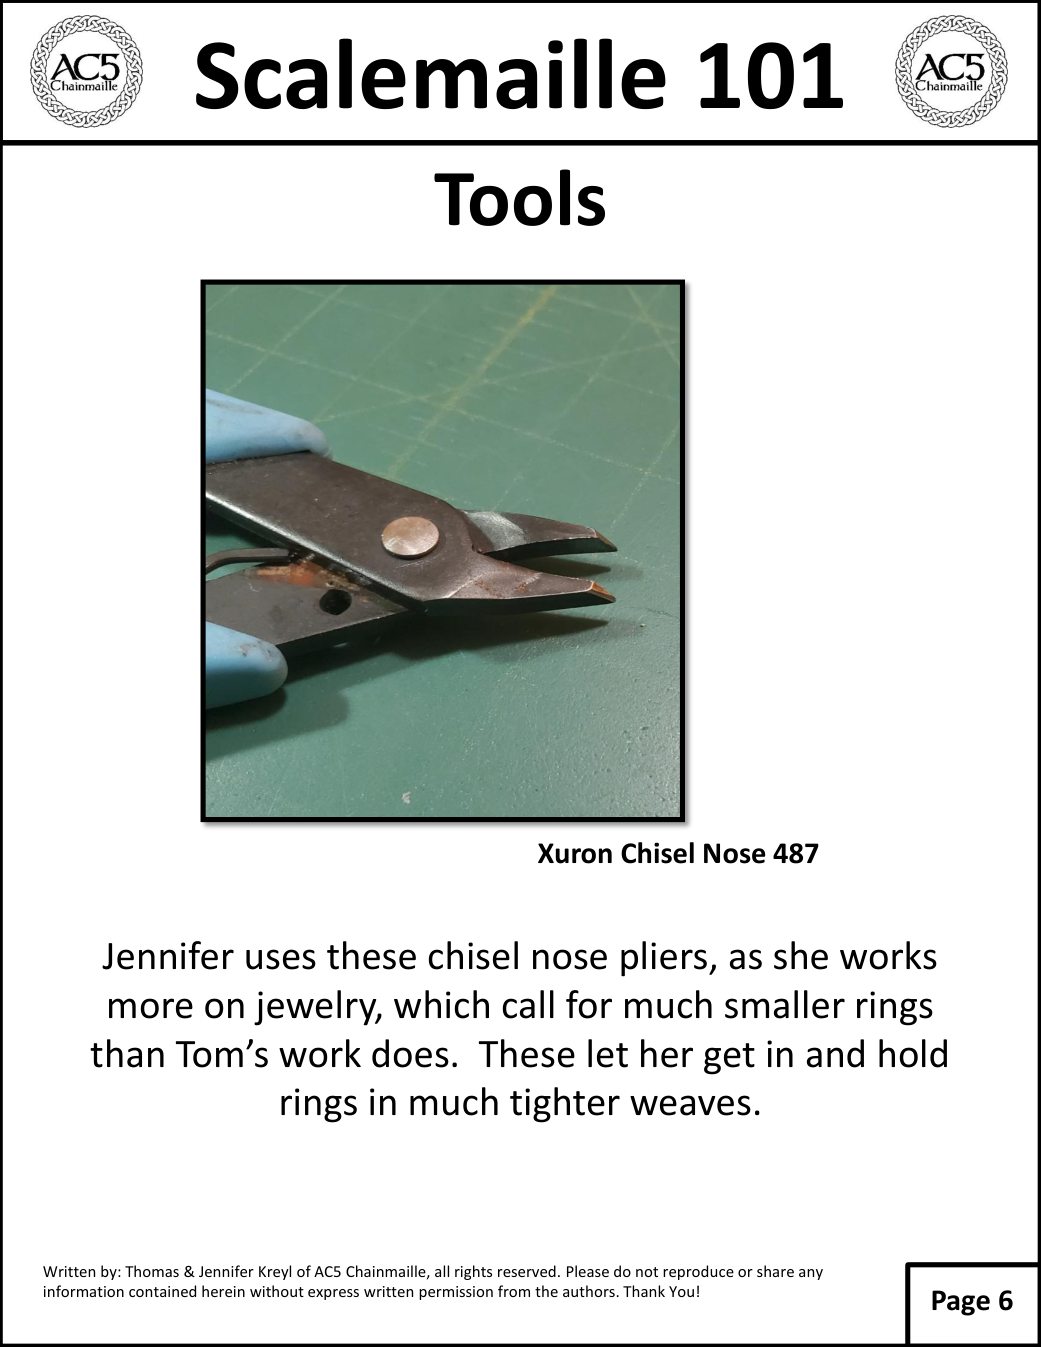
Tools Xuron Chisel Nose 487 Jennifer uses these chisel nose pliers, as she works more on jewelry, which call for much smaller rings than Tom’s work does. These let her get in and hold rings in much tighter weaves.

Original tutorial · Page 7 of 37
Scalemaille 101 original illustrated instruction page 7
Read searchable text for page 7

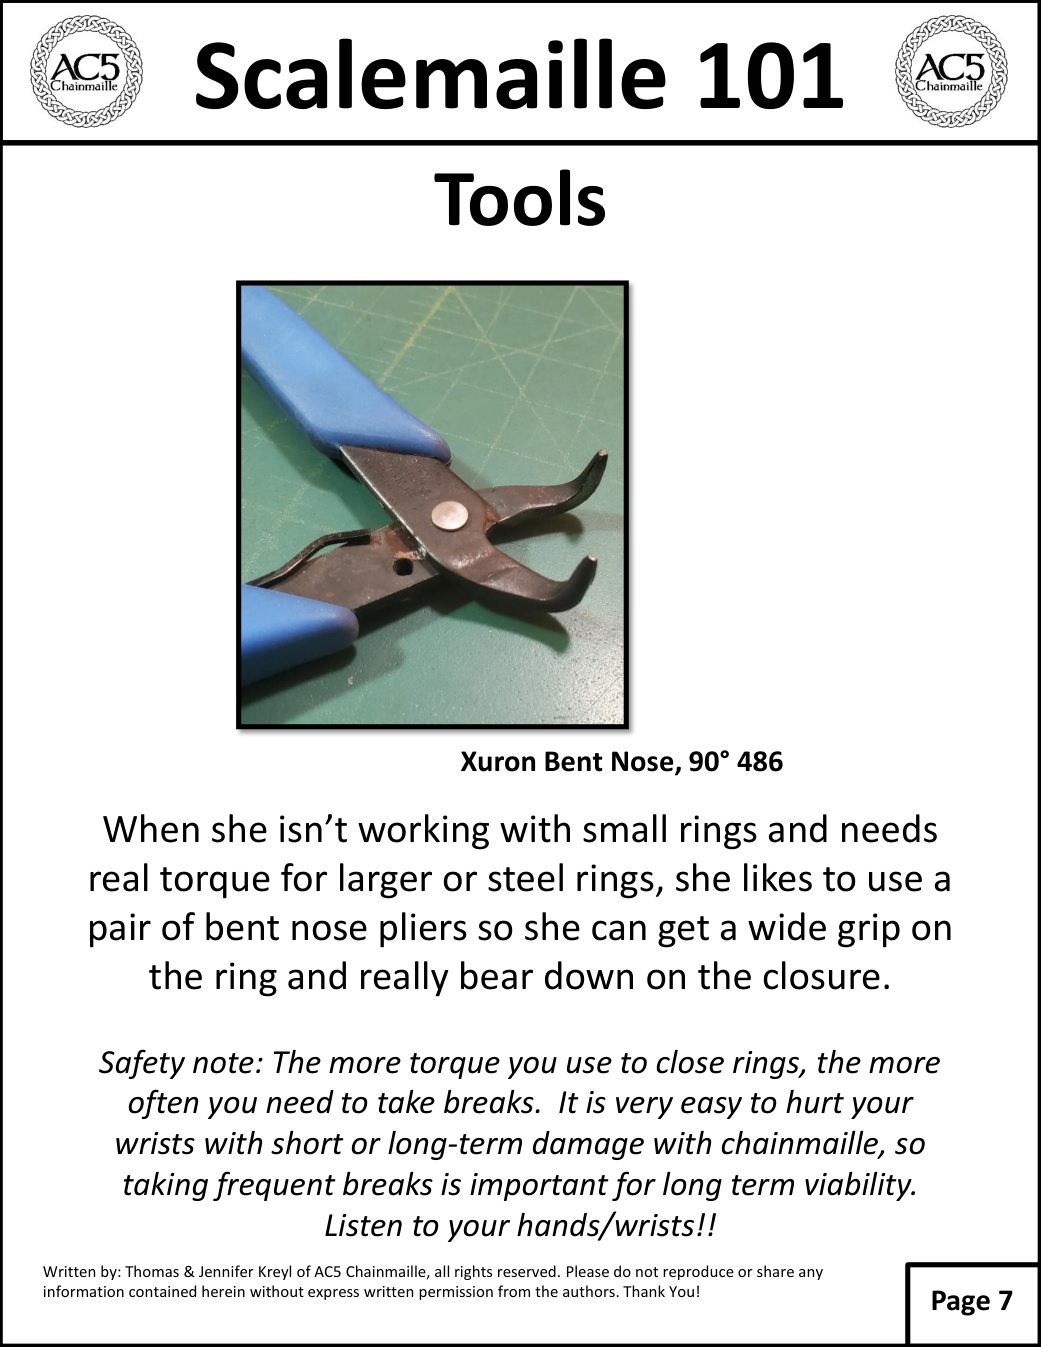
Tools Xuron Bent Nose, 90° 486 When she isn’t working with small rings and needs real torque for larger or steel rings, she likes to use a pair of bent nose pliers so she can get a wide grip on the ring and really bear down on the closure. Safety note: The more torque you use to close rings, the more often you need to take breaks. It is very easy to hurt your wrists with short or long-term damage with chainmaille, so taking frequent breaks is important for long term viability. Listen to your hands/wrists!!

Original tutorial · Page 8 of 37
Scalemaille 101 original illustrated instruction page 8
Read searchable text for page 8

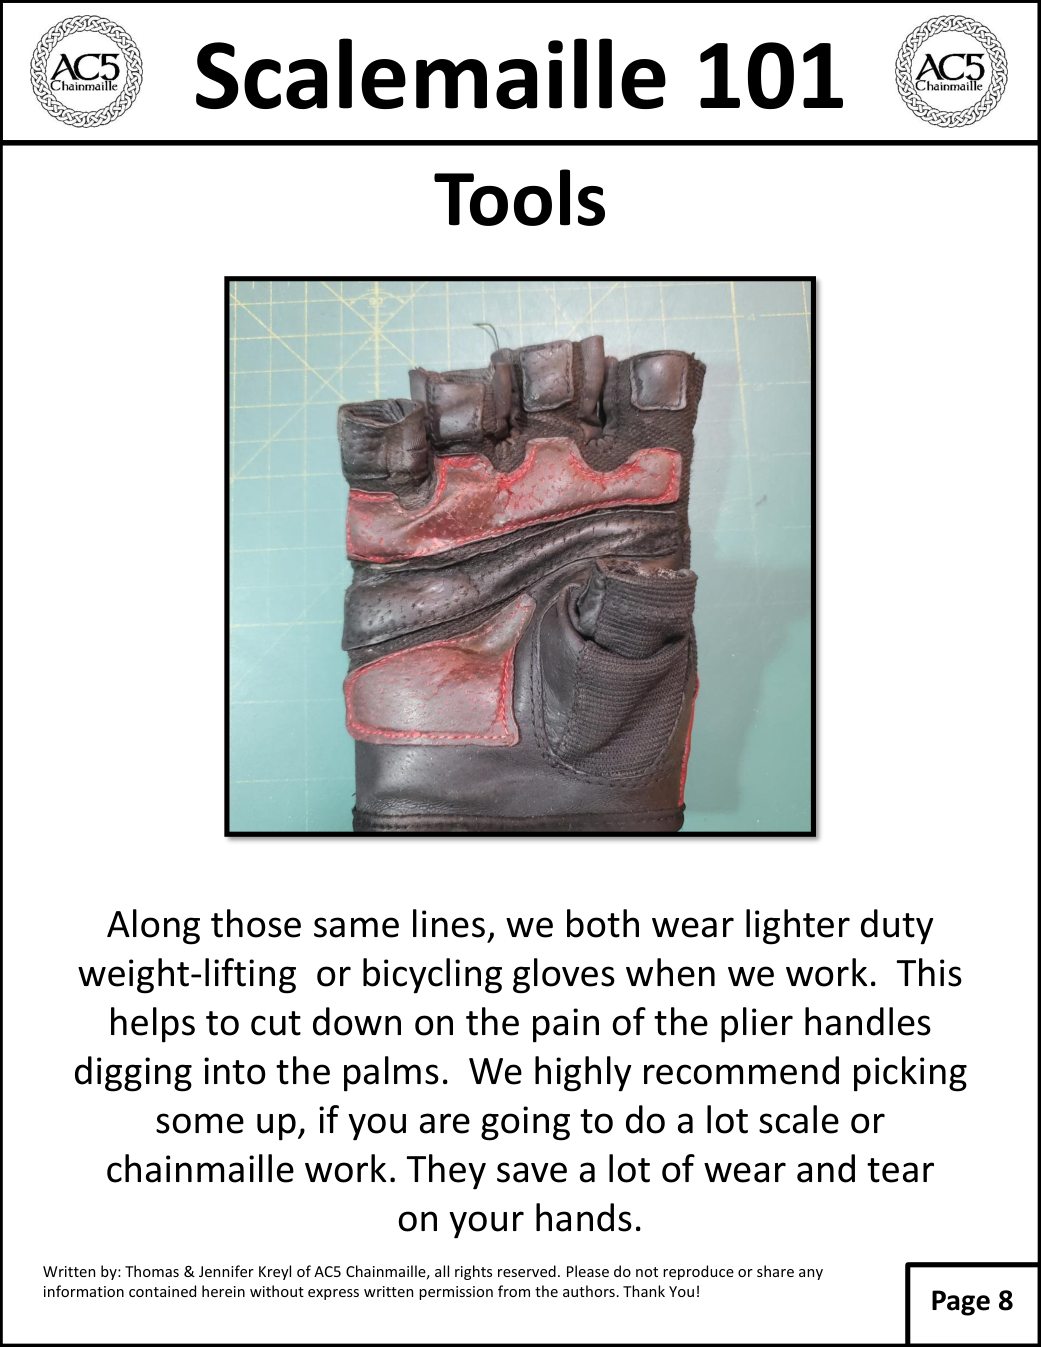
Tools Along those same lines, we both wear lighter duty weight-lifting or bicycling gloves when we work. This helps to cut down on the pain of the plier handles digging into the palms. We highly recommend picking some up, if you are going to do a lot scale or chainmaille work. They save a lot of wear and tear on your hands.

Original tutorial · Page 9 of 37
Scalemaille 101 original illustrated instruction page 9
Read searchable text for page 9

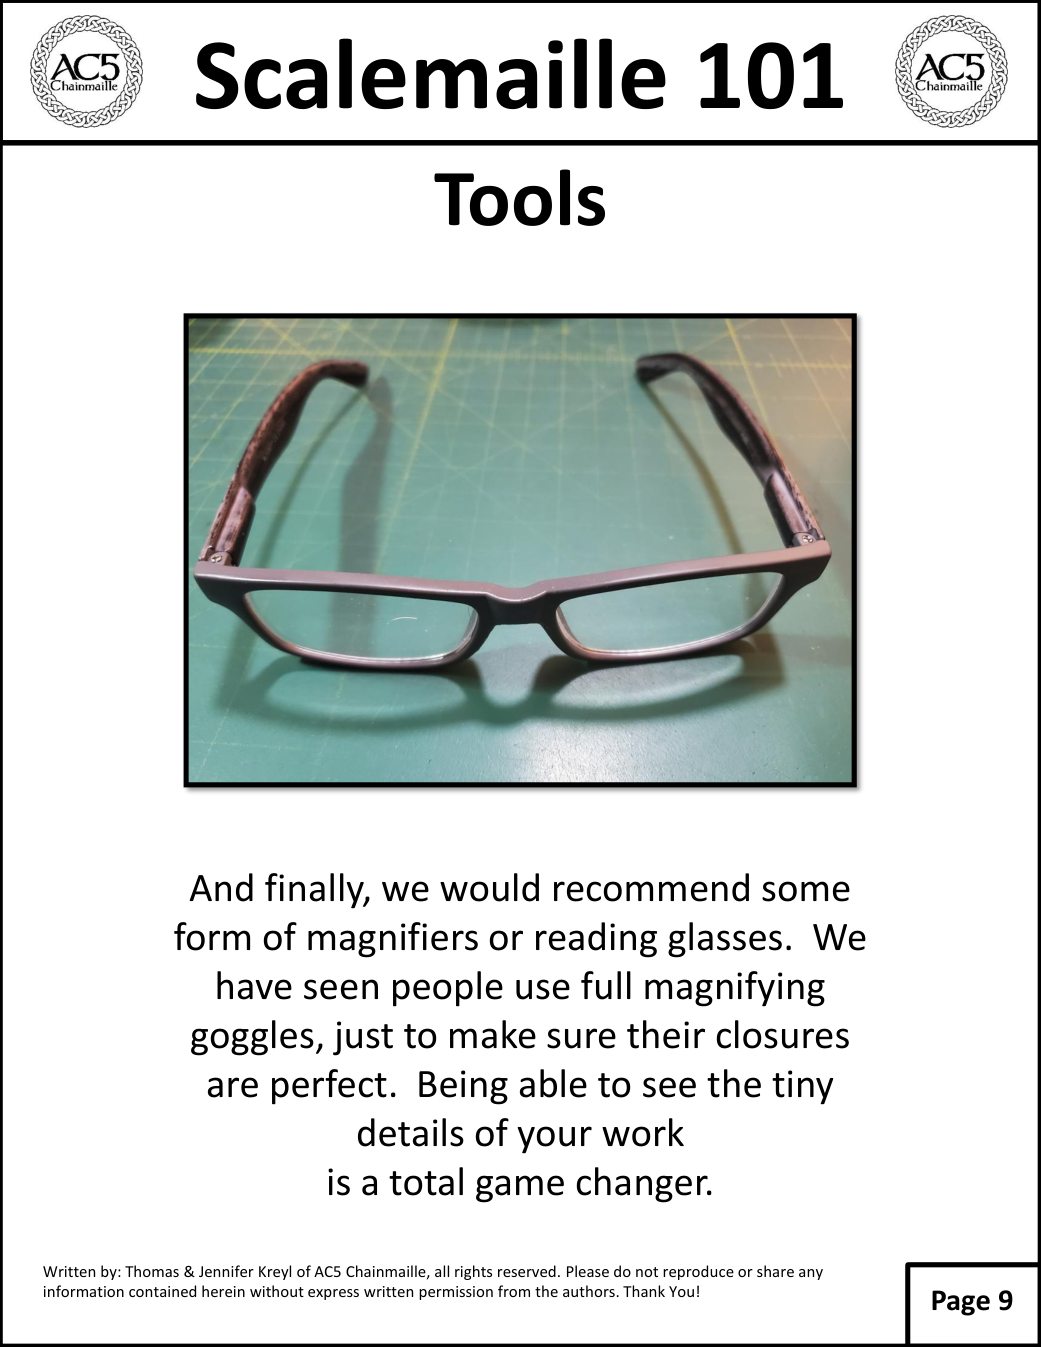
Tools And finally, we would recommend some form of magnifiers or reading glasses. We have seen people use full magnifying goggles, just to make sure their closures are perfect. Being able to see the tiny details of your work is a total game changer.

↑ Back to tutorial contents

Choosing Materials & Scales

Original tutorial · Page 10 of 37
Scalemaille 101 original illustrated instruction page 10
Read searchable text for page 10

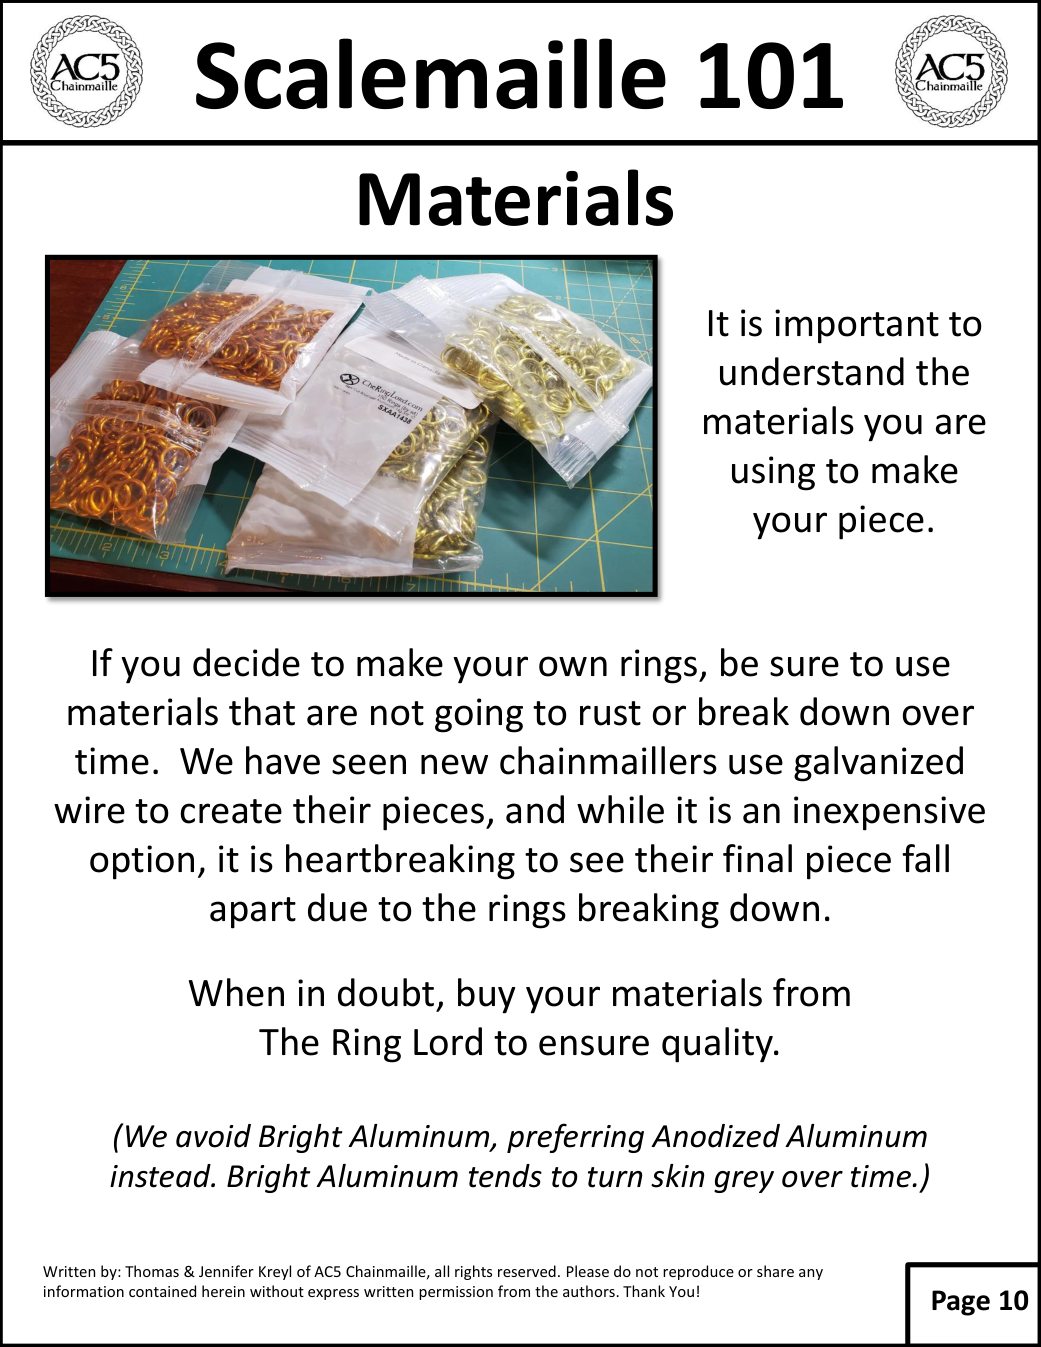
Materials It is important to understand the materials you are using to make your piece. If you decide to make your own rings, be sure to use materials that are not going to rust or break down over time. We have seen new chainmaillers use galvanized wire to create their pieces, and while it is an inexpensive option, it is heartbreaking to see their final piece fall apart due to the rings breaking down. When in doubt, buy your materials from The Ring Lord to ensure quality. (We avoid Bright Aluminum, preferring Anodized Aluminum instead. Bright Aluminum tends to turn skin grey over time.)

Original tutorial · Page 11 of 37
Scalemaille 101 original illustrated instruction page 11
Read searchable text for page 11

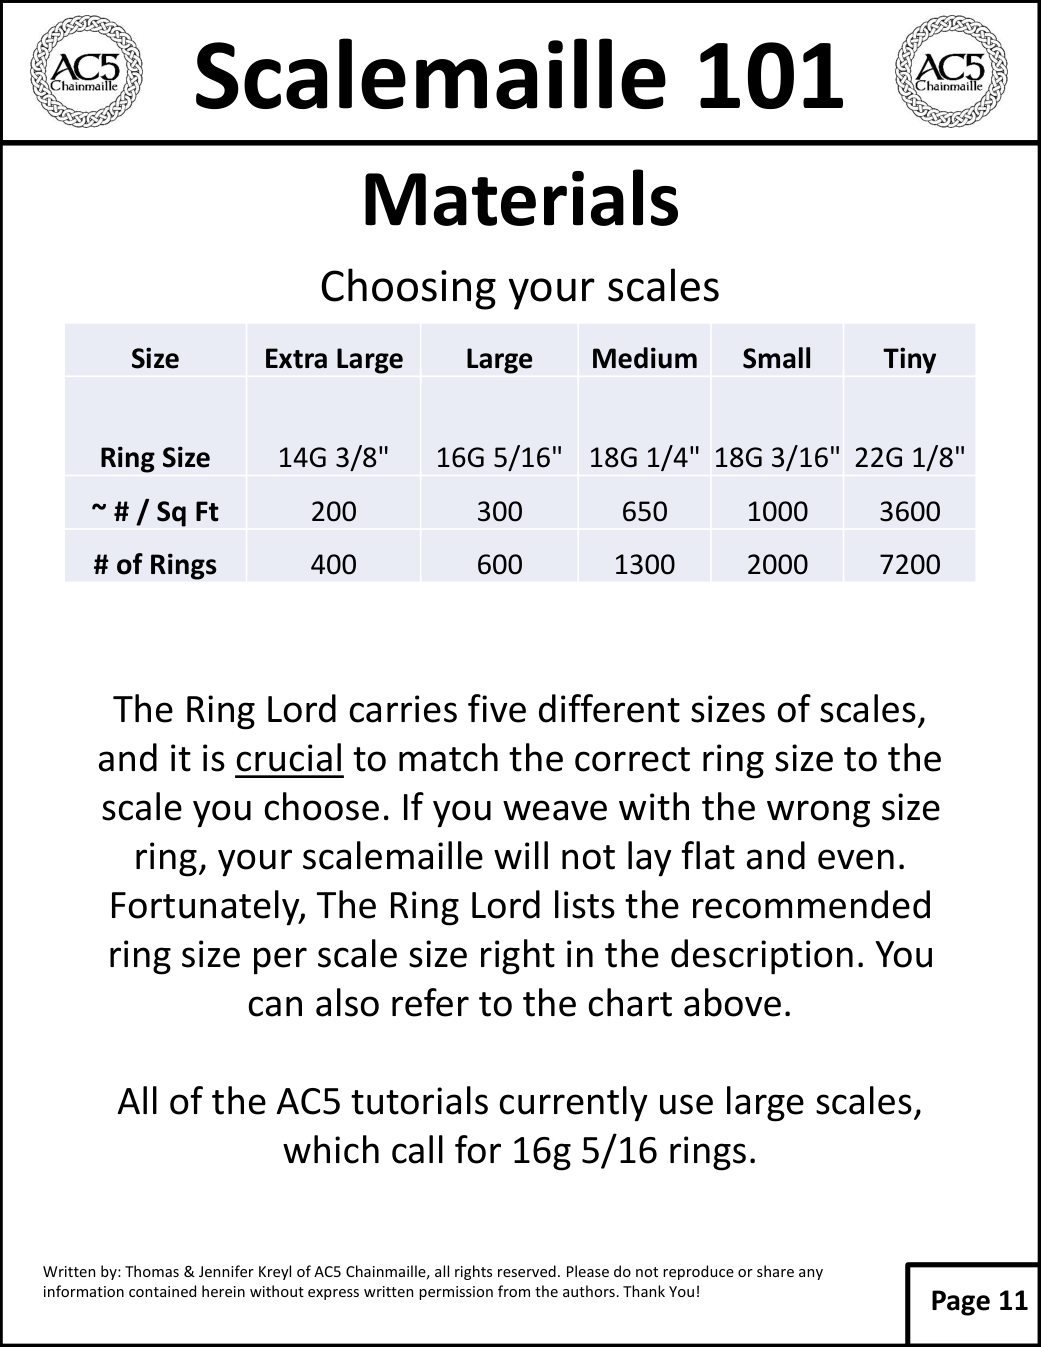
Materials Choosing your scales Size Extra Large Large Medium Small Tiny Ring Size 14G 3/8" 16G 5/16" 18G 1/4" 18G 3/16" 22G 1/8" ~ # / Sq Ft 200 300 650 1000 3600 # of Rings 400 600 1300 2000 7200 The Ring Lord carries five different sizes of scales, and it is crucial to match the correct ring size to the scale you choose. If you weave with the wrong size ring, your scalemaille will not lay flat and even. Fortunately, The Ring Lord lists the recommended ring size per scale size right in the description. You can also refer to the chart above. All of the AC5 tutorials currently use large scales, which call for 16g 5/16 rings.

Original tutorial · Page 12 of 37
Scalemaille 101 original illustrated instruction page 12
Read searchable text for page 12

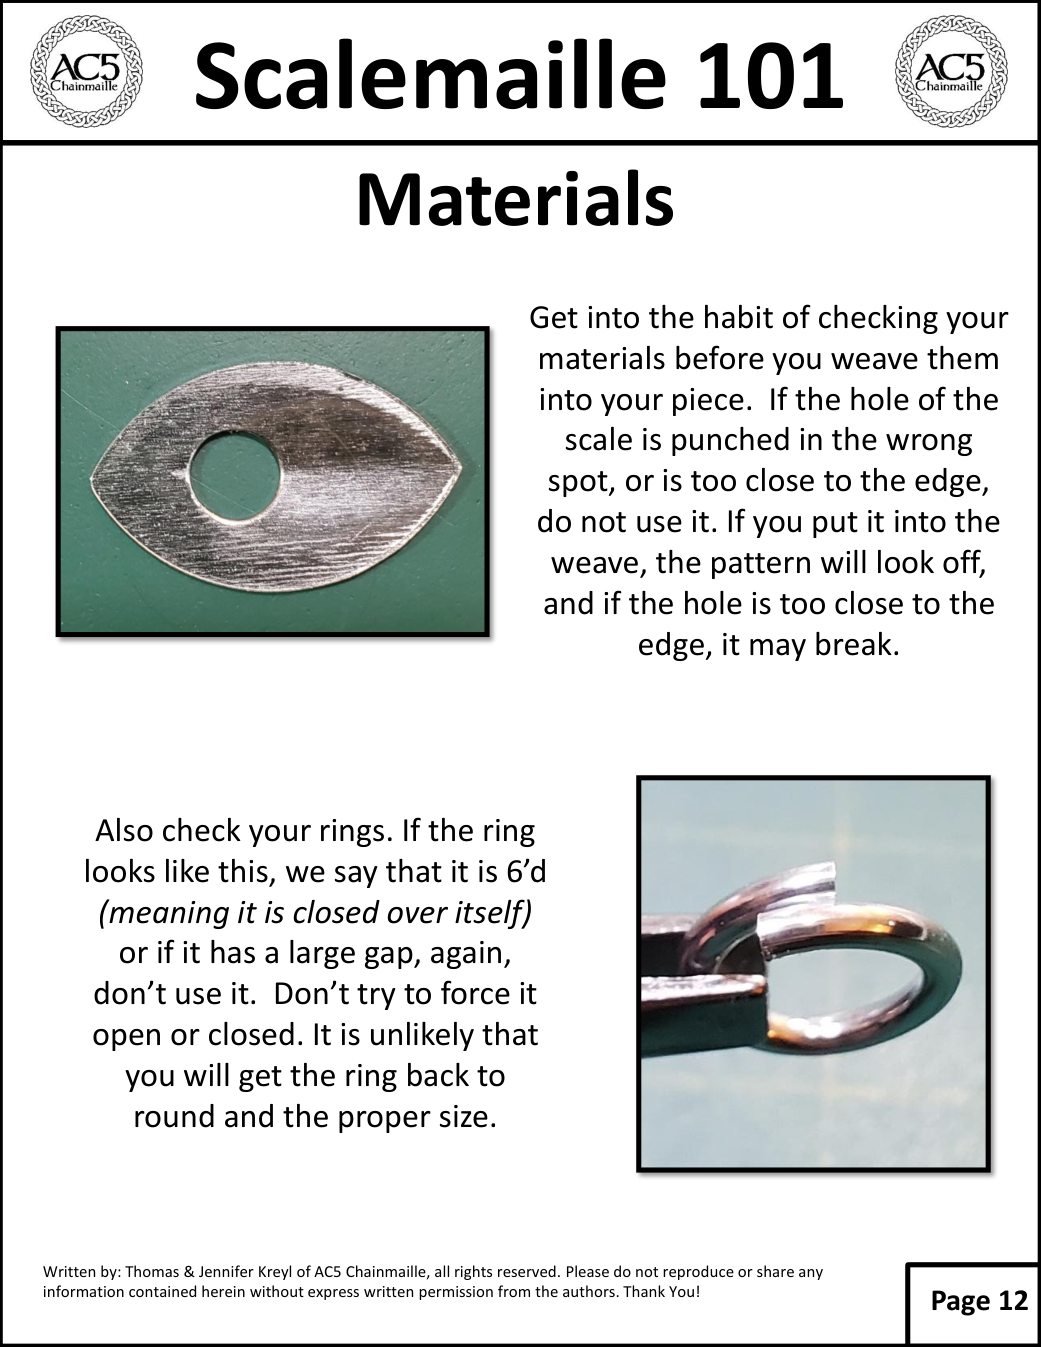
Materials Get into the habit of checking your materials before you weave them into your piece. If the hole of the scale is punched in the wrong spot, or is too close to the edge, do not use it. If you put it into the weave, the pattern will look off, and if the hole is too close to the edge, it may break. Also check your rings. If the ring looks like this, we say that it is 6’d (meaning it is closed over itself) or if it has a large gap, again, don’t use it. Don’t try to force it open or closed. It is unlikely that you will get the ring back to round and the proper size.

Original tutorial · Page 13 of 37
Scalemaille 101 original illustrated instruction page 13
Read searchable text for page 13

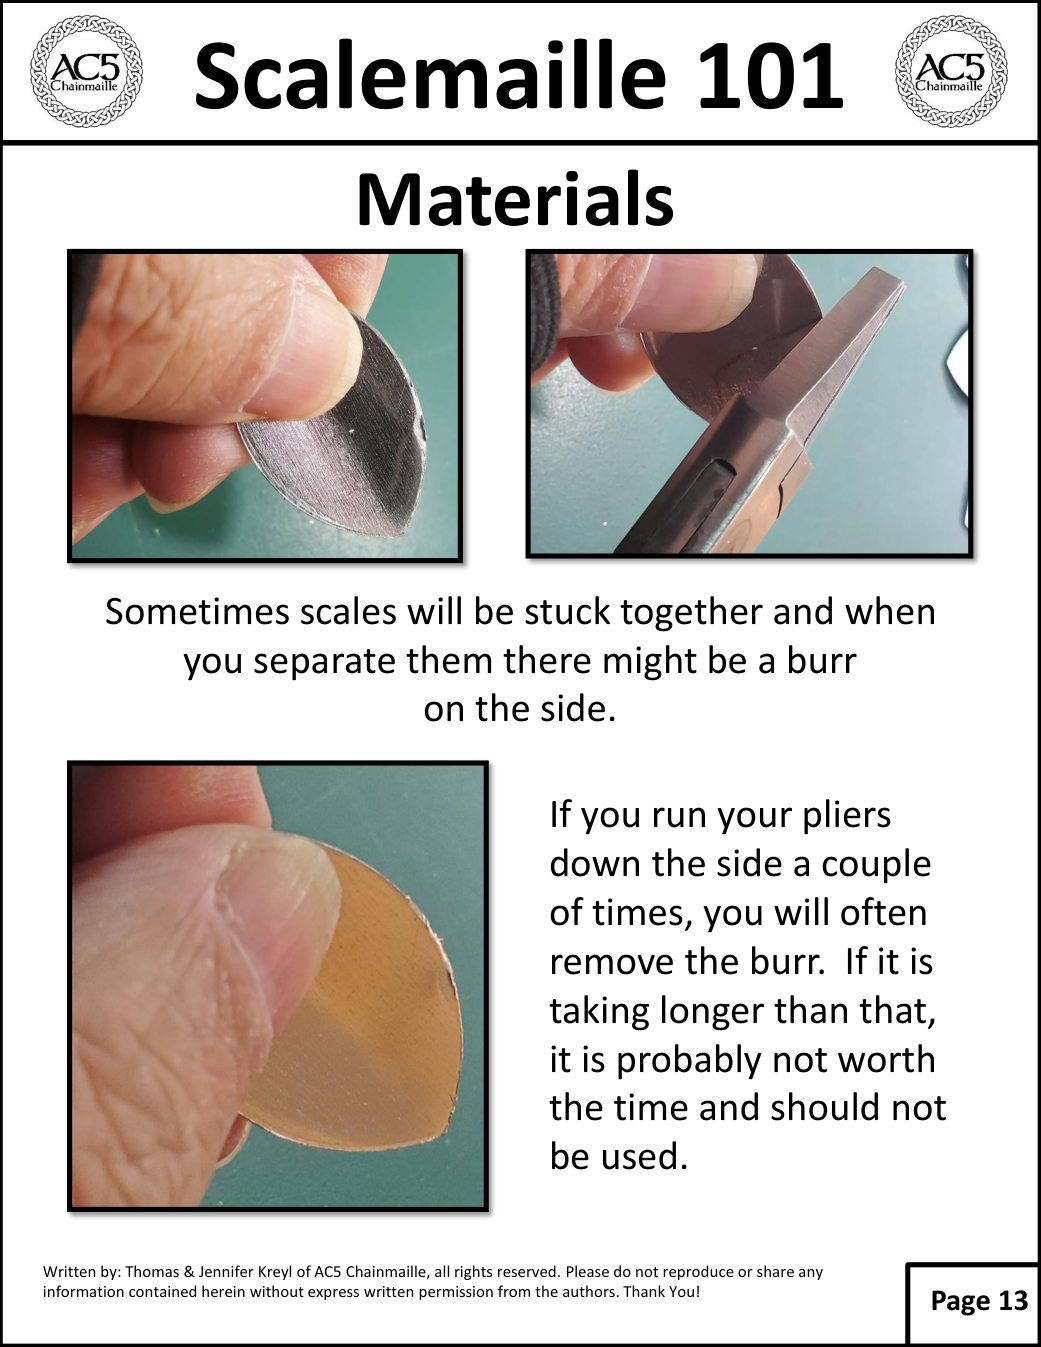
Materials Sometimes scales will be stuck together and when you separate them there might be a burr on the side. If you run your pliers down the side a couple of times, you will often remove the burr. If it is taking longer than that, it is probably not worth the time and should not be used.

↑ Back to tutorial contents

Understanding Scalemaille

Original tutorial · Page 14 of 37
Scalemaille 101 original illustrated instruction page 14
Read searchable text for page 14

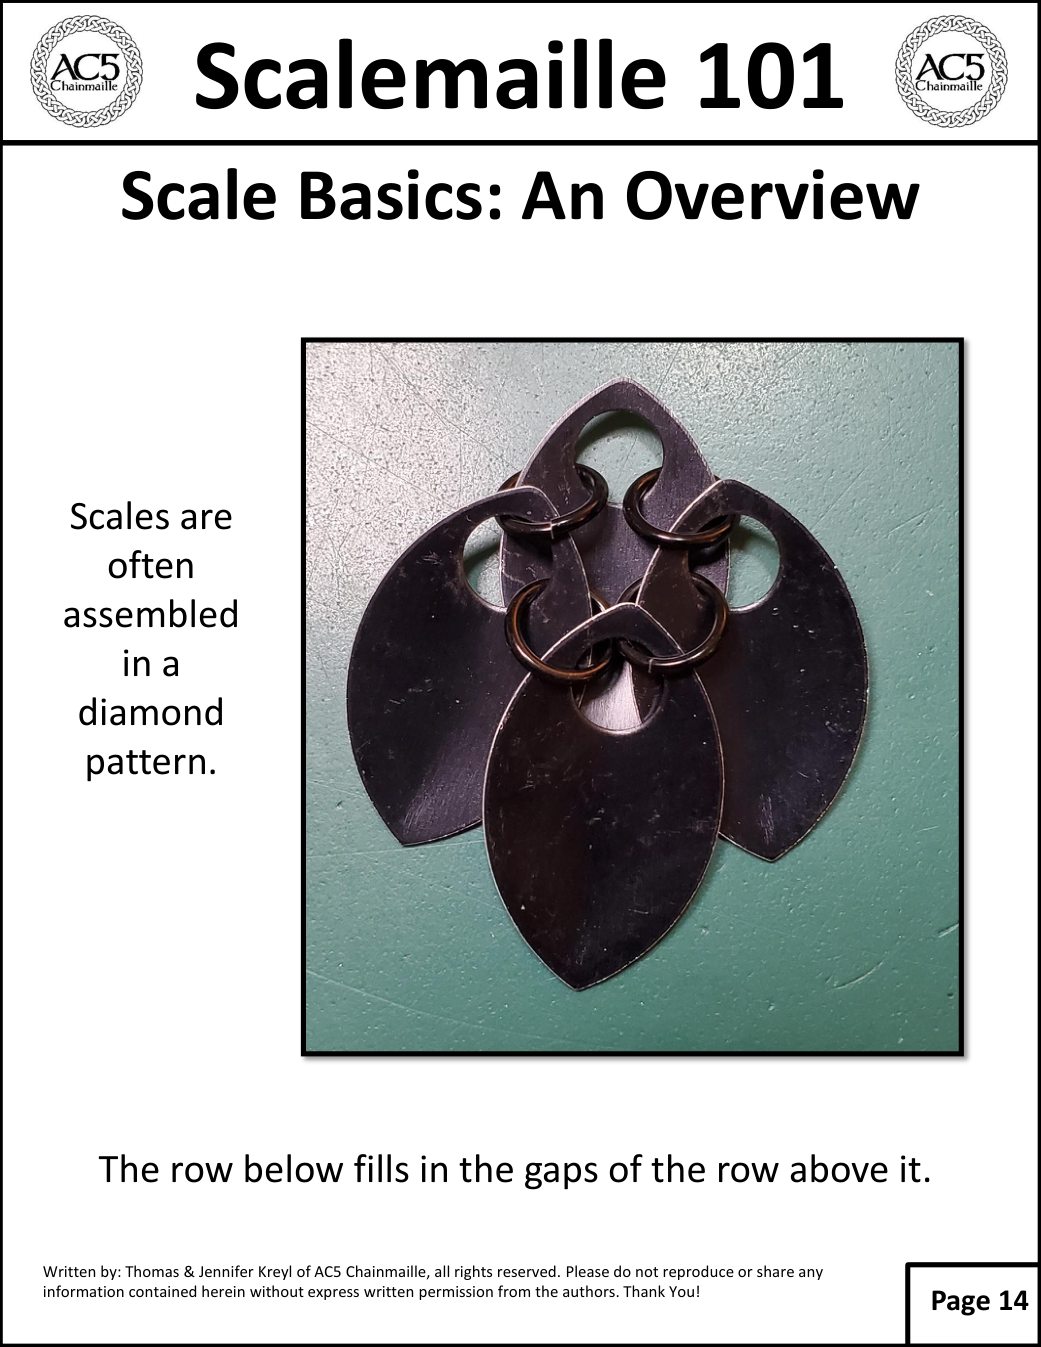
Scale Basics: An Overview Scales are often assembled in a diamond pattern. The row below fills in the gaps of the row above it.

Original tutorial · Page 15 of 37
Scalemaille 101 original illustrated instruction page 15
Read searchable text for page 15

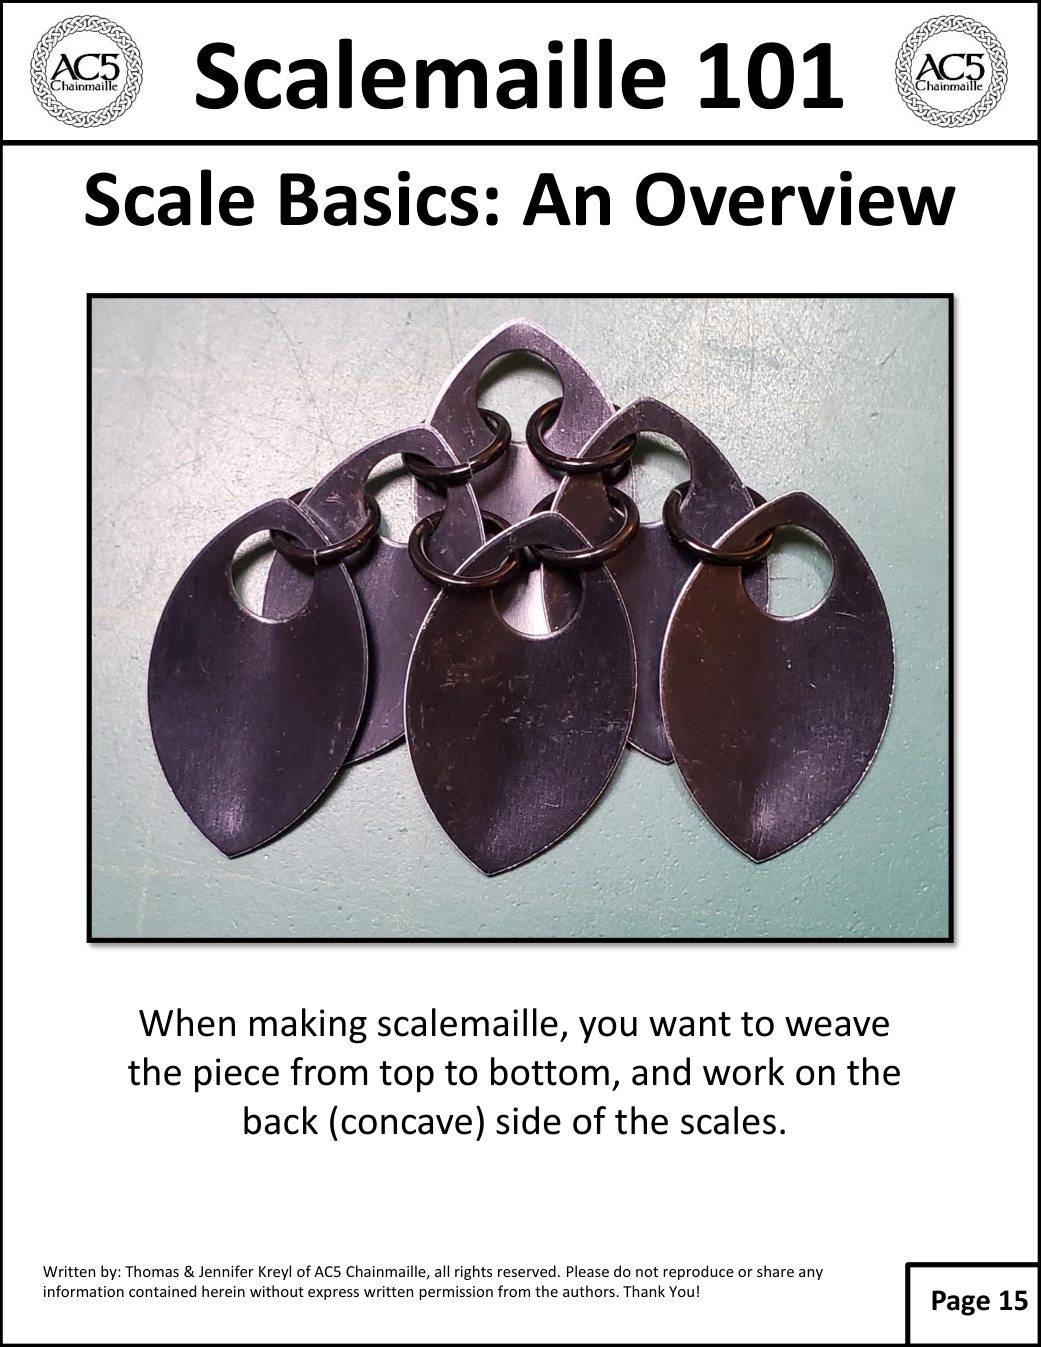
Scale Basics: An Overview When making scalemaille, you want to weave the piece from top to bottom, and work on the back (concave) side of the scales.

Original tutorial · Page 16 of 37
Scalemaille 101 original illustrated instruction page 16
Read searchable text for page 16

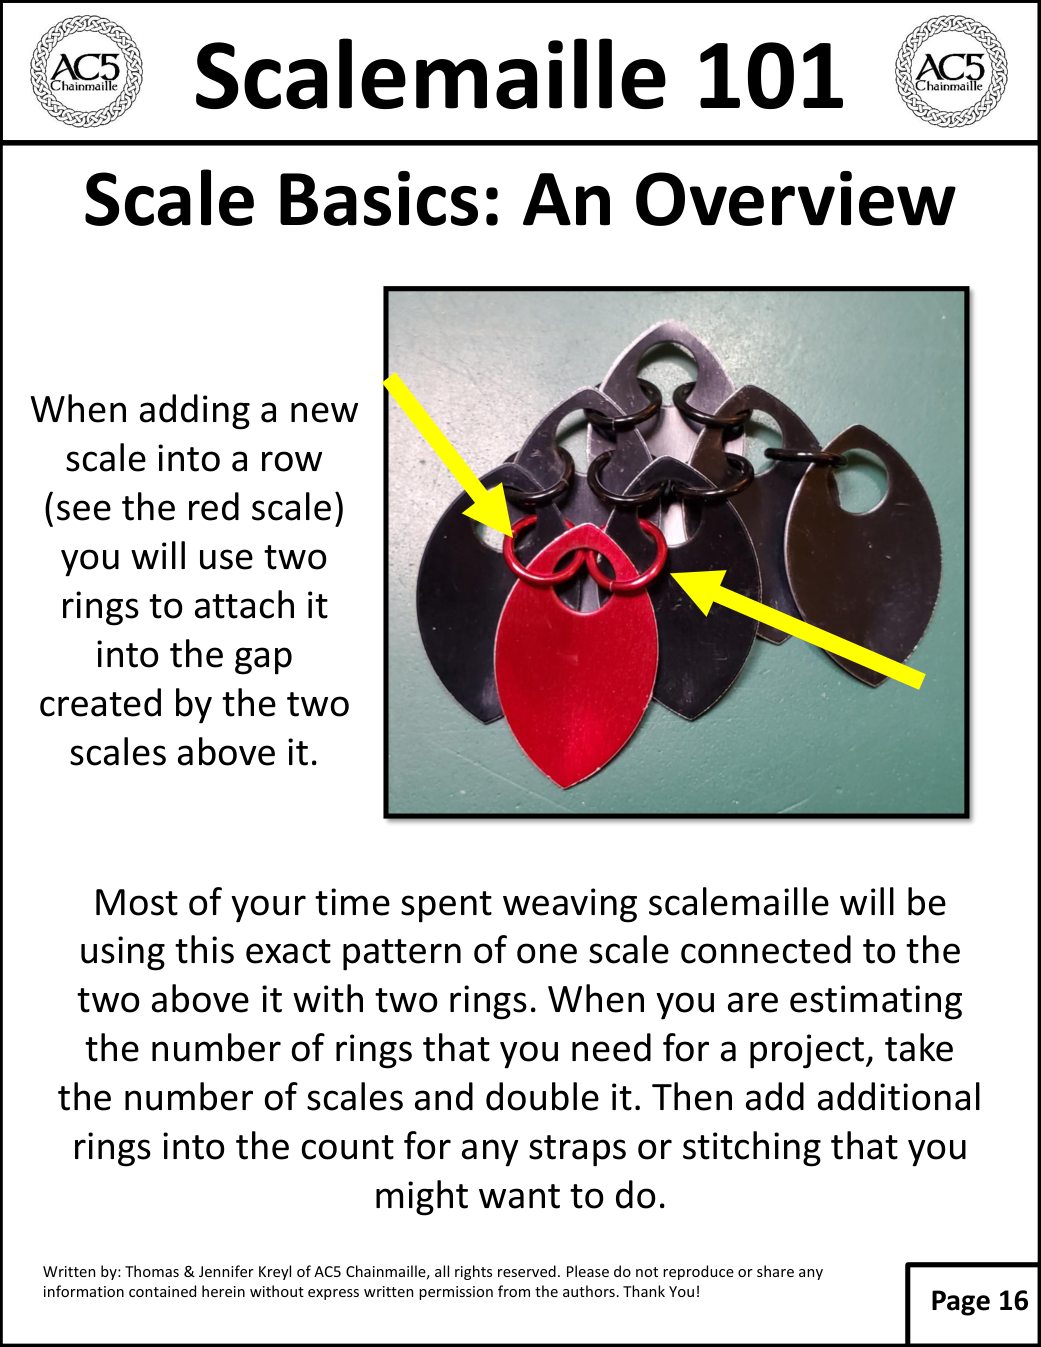
Scale Basics: An Overview When adding a new scale into a row (see the red scale) you will use two rings to attach it into the gap created by the two scales above it. Most of your time spent weaving scalemaille will be using this exact pattern of one scale connected to the two above it with two rings. When you are estimating the number of rings that you need for a project, take the number of scales and double it. Then add additional rings into the count for any straps or stitching that you might want to do.

Original tutorial · Page 17 of 37
Scalemaille 101 original illustrated instruction page 17
Read searchable text for page 17

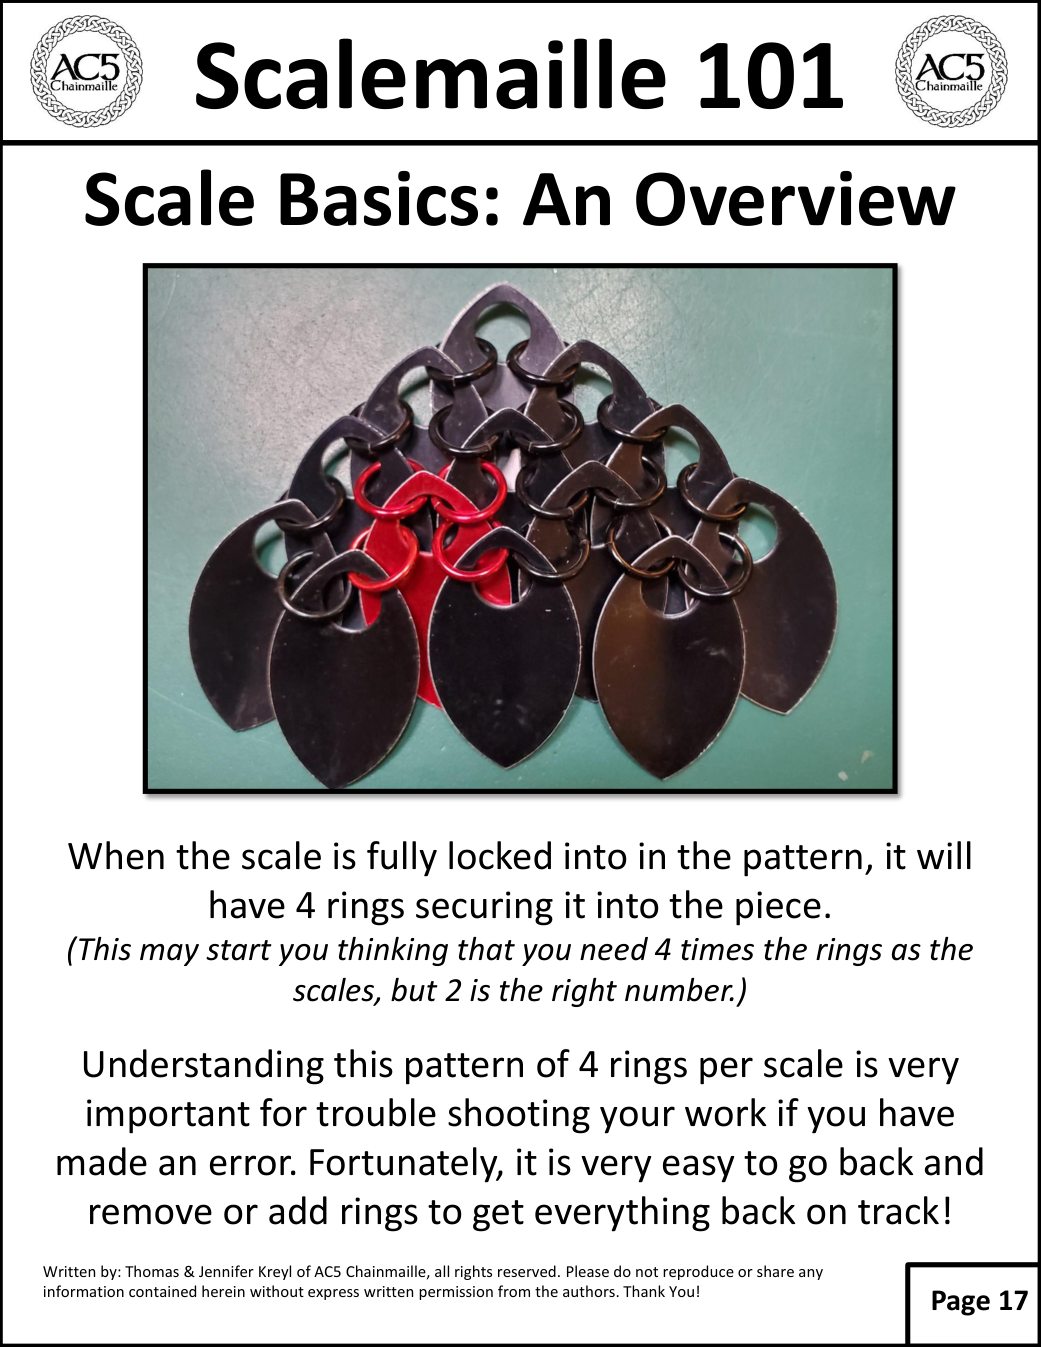
Scale Basics: An Overview When the scale is fully locked into in the pattern, it will have 4 rings securing it into the piece. (This may start you thinking that you need 4 times the rings as the scales, but 2 is the right number.) Understanding this pattern of 4 rings per scale is very important for trouble shooting your work if you have made an error. Fortunately, it is very easy to go back and remove or add rings to get everything back on track!

Original tutorial · Page 18 of 37
Scalemaille 101 original illustrated instruction page 18
Read searchable text for page 18

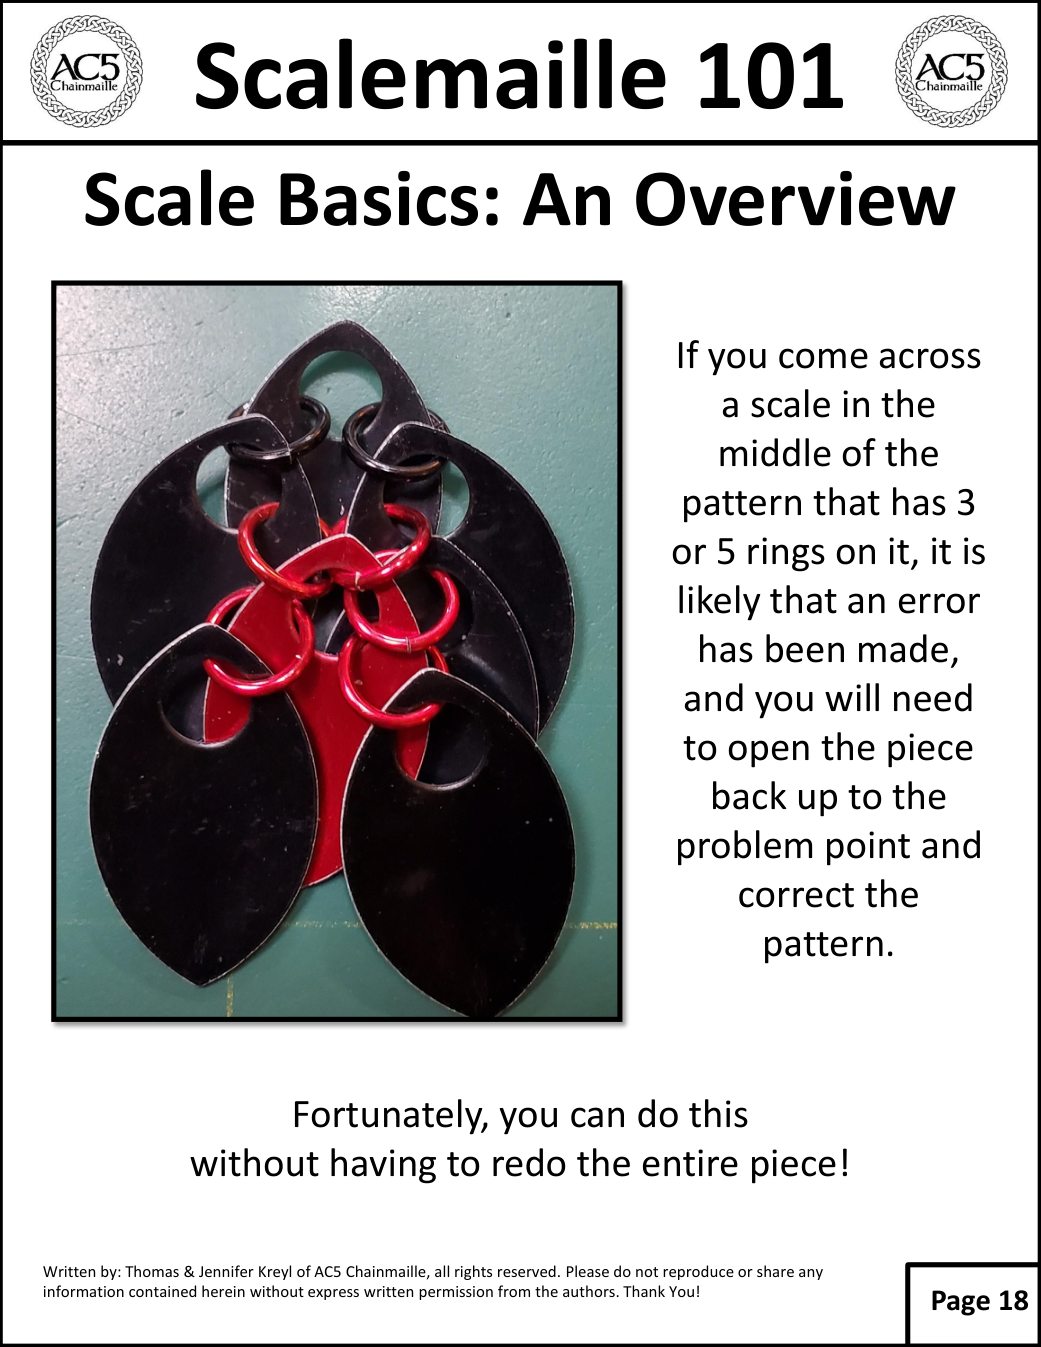
Scale Basics: An Overview If you come across a scale in the middle of the pattern that has 3 or 5 rings on it, it is likely that an error has been made, and you will need to open the piece back up to the problem point and correct the pattern. Fortunately, you can do this without having to redo the entire piece!

Original tutorial · Page 19 of 37
Scalemaille 101 original illustrated instruction page 19
Read searchable text for page 19

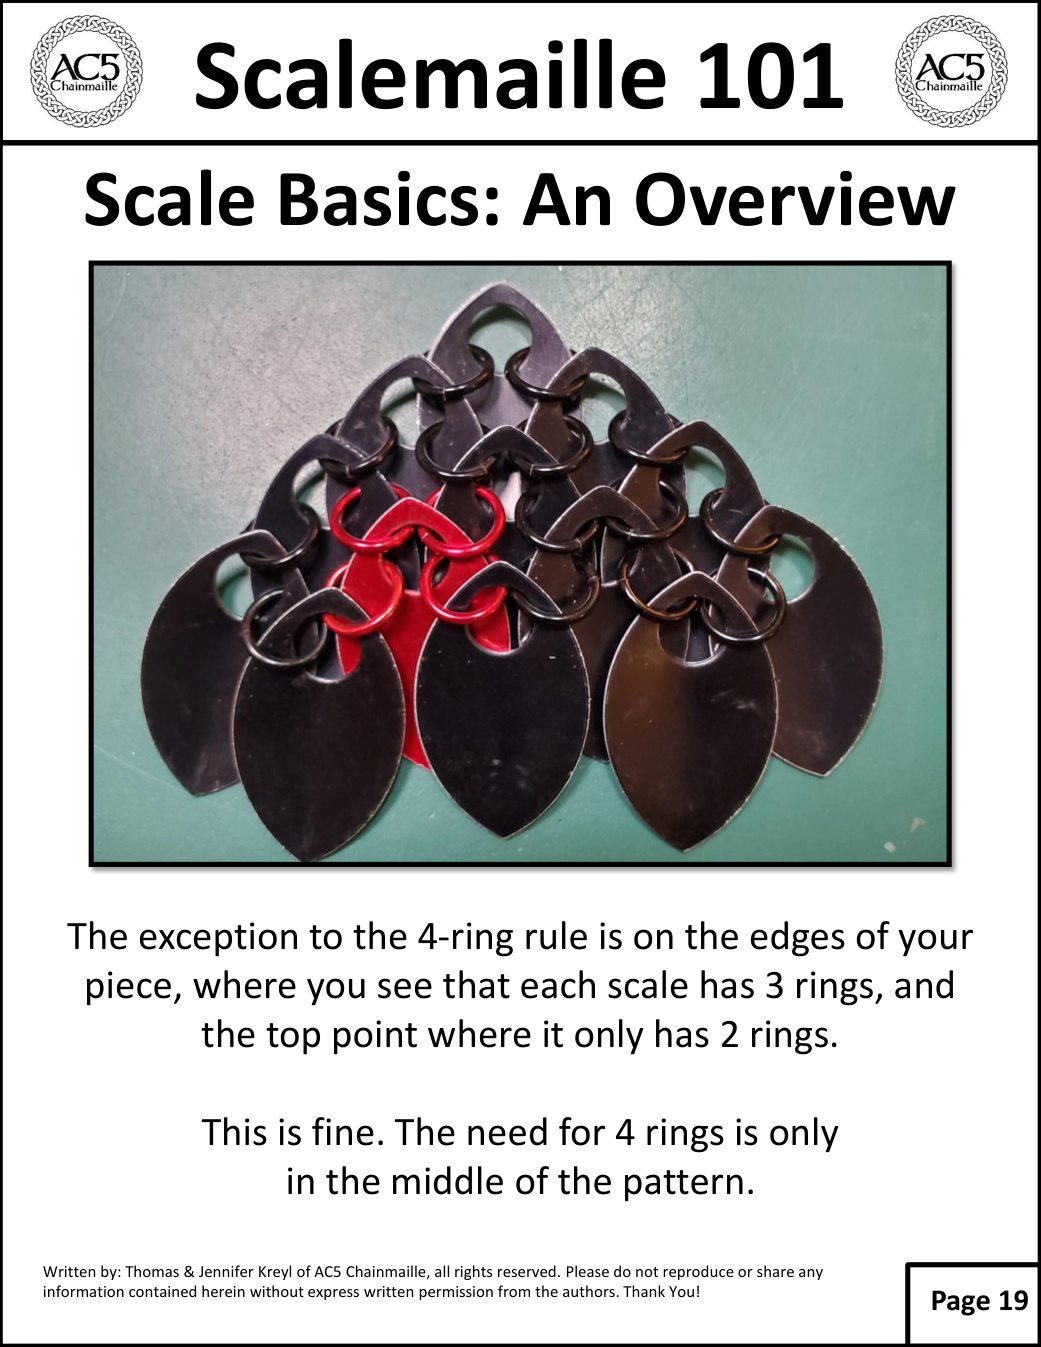
Scale Basics: An Overview The exception to the 4-ring rule is on the edges of your piece, where you see that each scale has 3 rings, and the top point where it only has 2 rings. This is fine. The need for 4 rings is only in the middle of the pattern.

↑ Back to tutorial contents

Getting Started — Step by Step

Original tutorial · Page 20 of 37
Scalemaille 101 original illustrated instruction page 20
Read searchable text for page 20

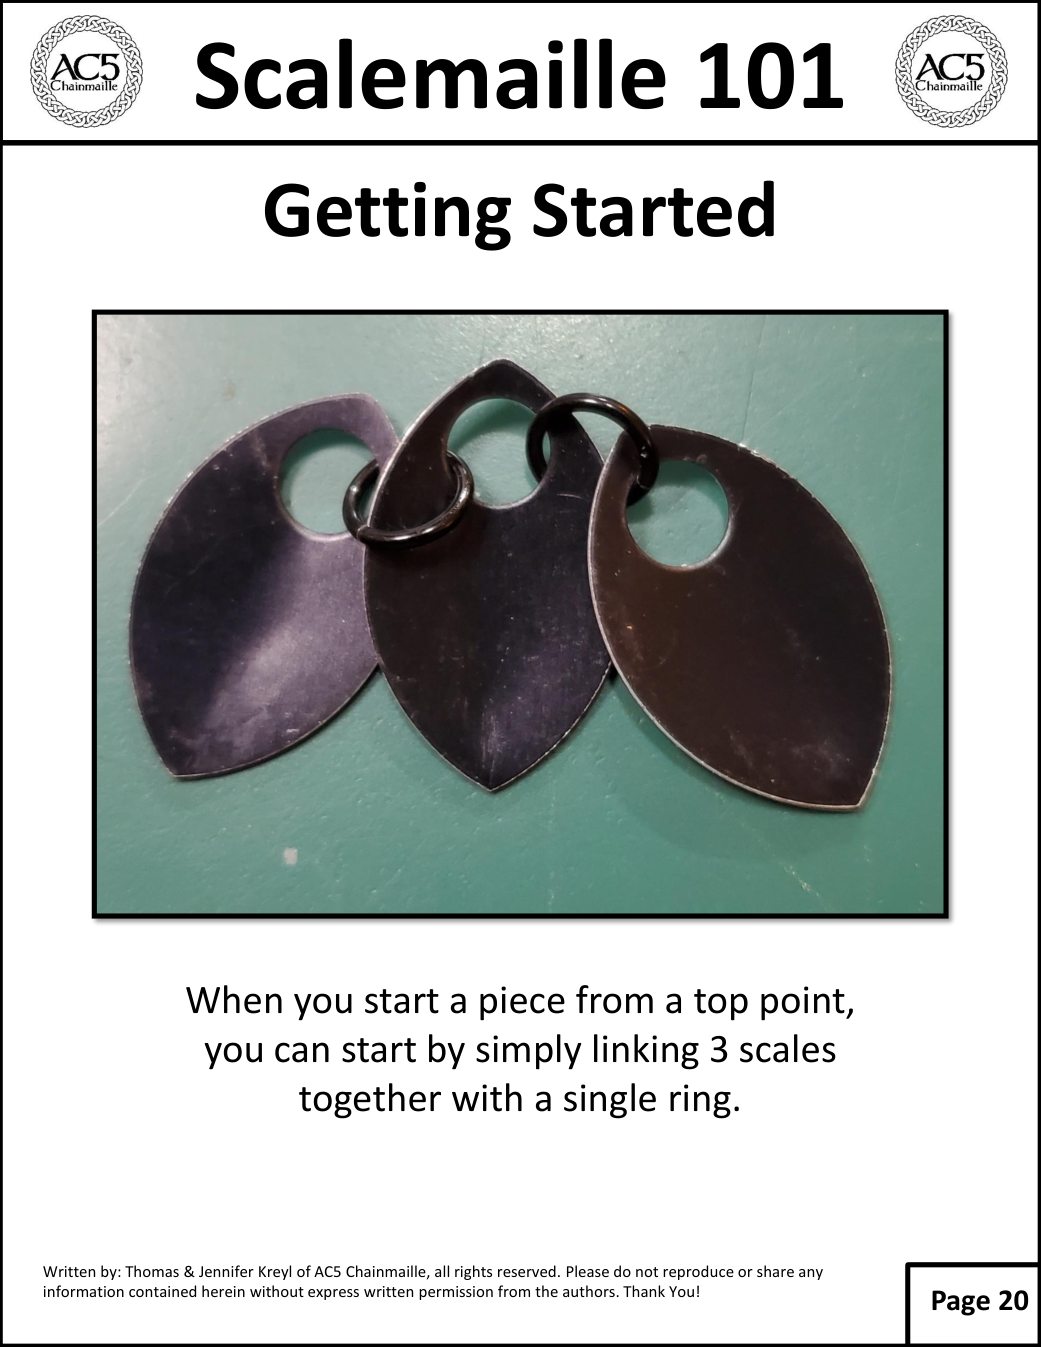
Getting Started When you start a piece from a top point, you can start by simply linking 3 scales together with a single ring.

Original tutorial · Page 21 of 37
Scalemaille 101 original illustrated instruction page 21
Read searchable text for page 21

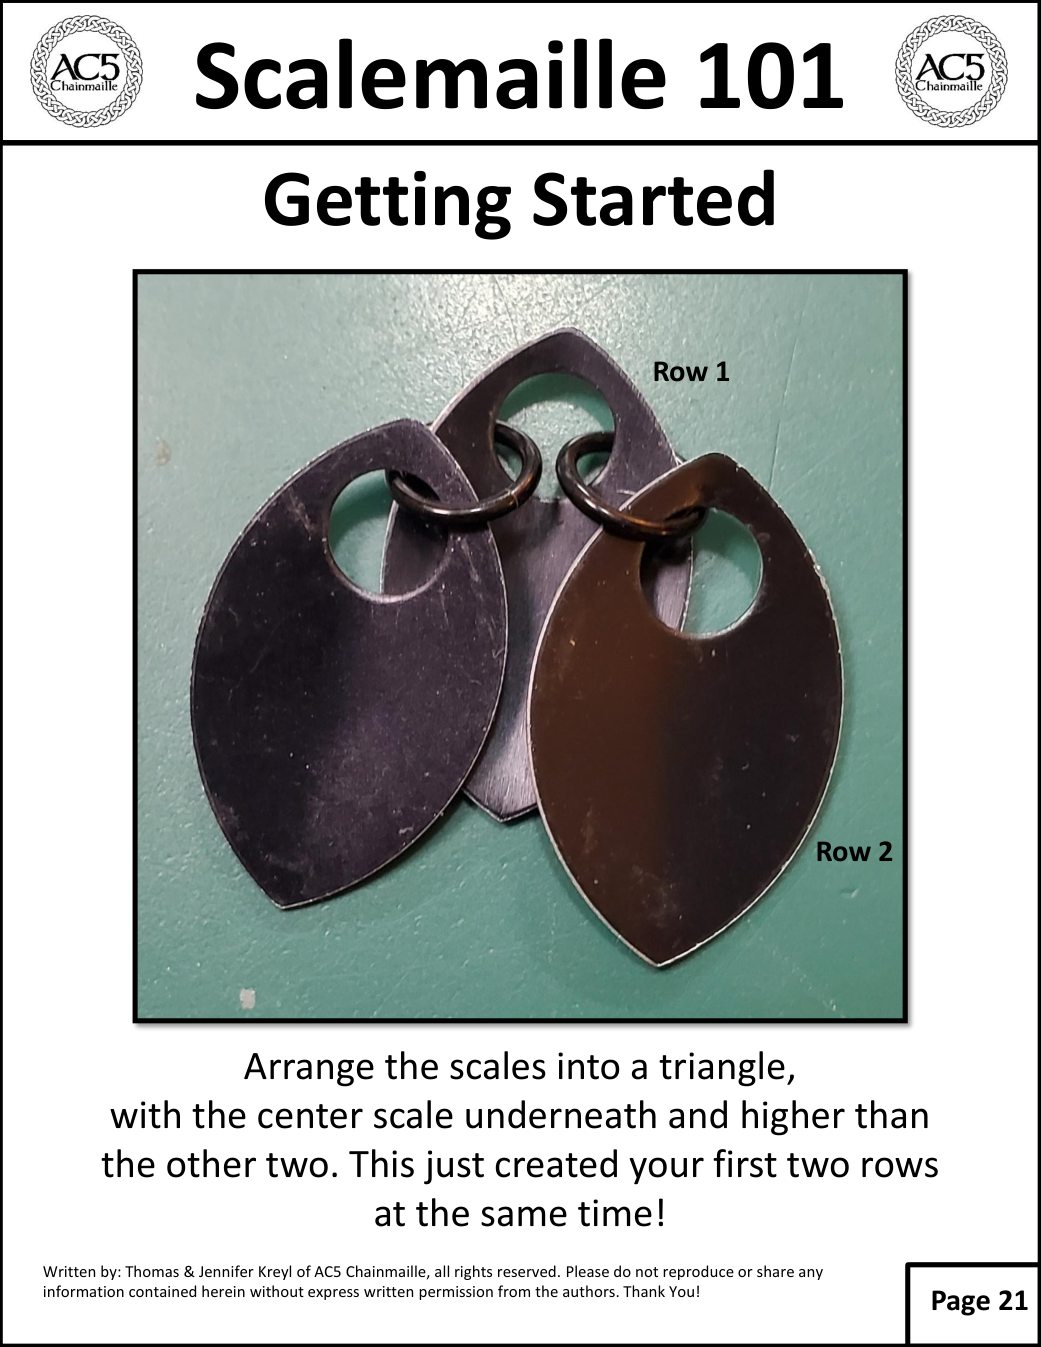
Getting Started Row 1 Row 2 Arrange the scales into a triangle, with the center scale underneath and higher than the other two. This just created your first two rows at the same time!

Original tutorial · Page 22 of 37
Scalemaille 101 original illustrated instruction page 22
Read searchable text for page 22

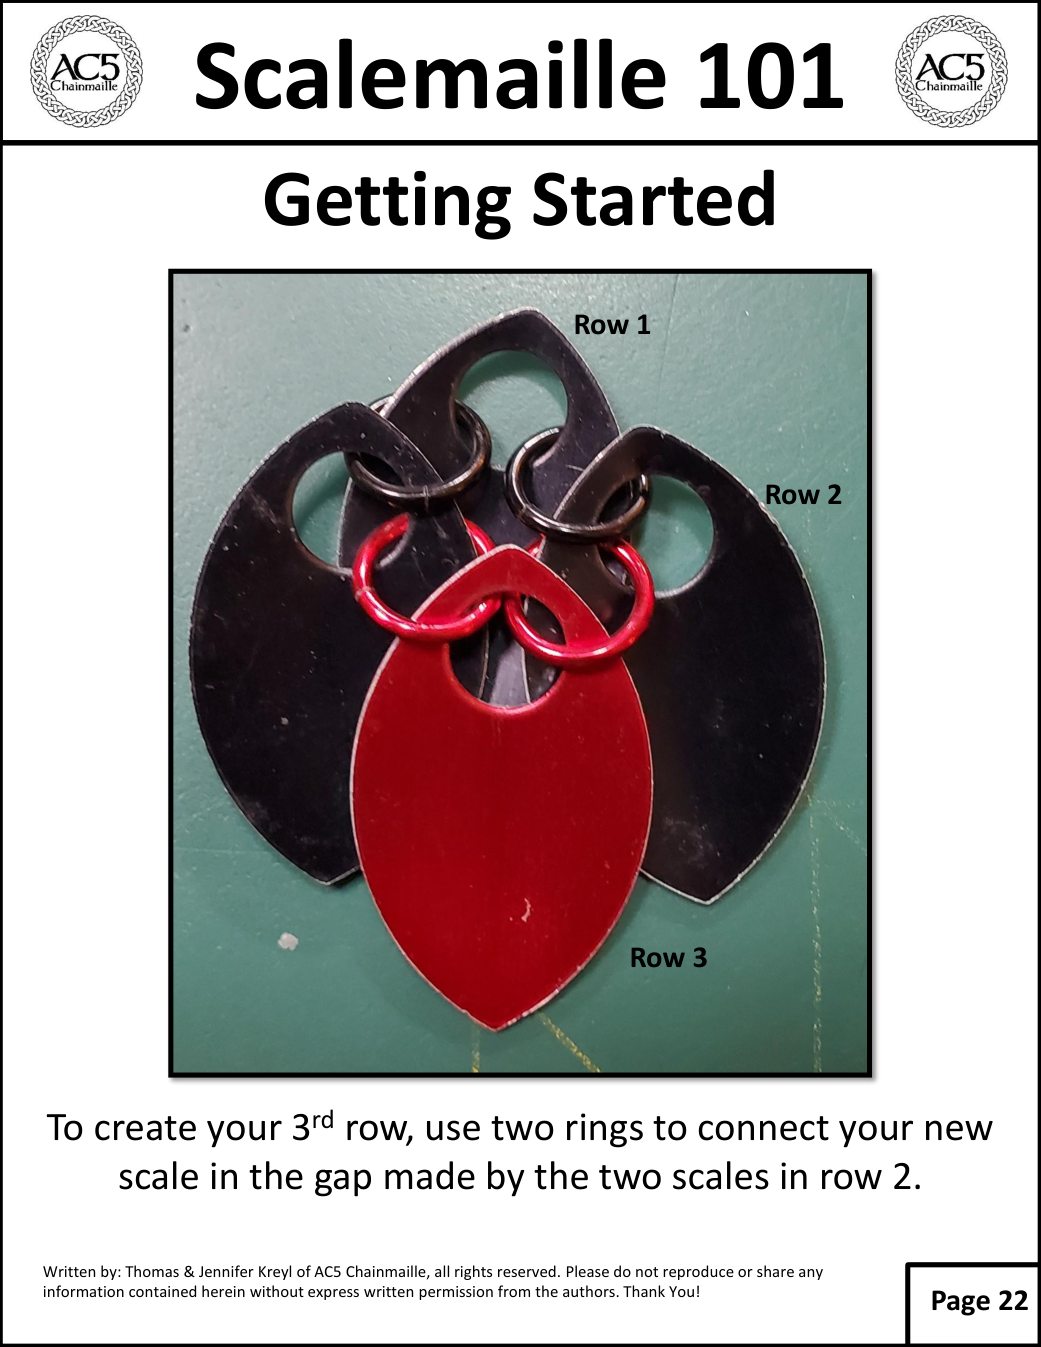
Getting Started Row 1 Row 2 Row 3 To create your 3rd row, use two rings to connect your new scale in the gap made by the two scales in row 2.

Original tutorial · Page 23 of 37
Scalemaille 101 original illustrated instruction page 23
Read searchable text for page 23

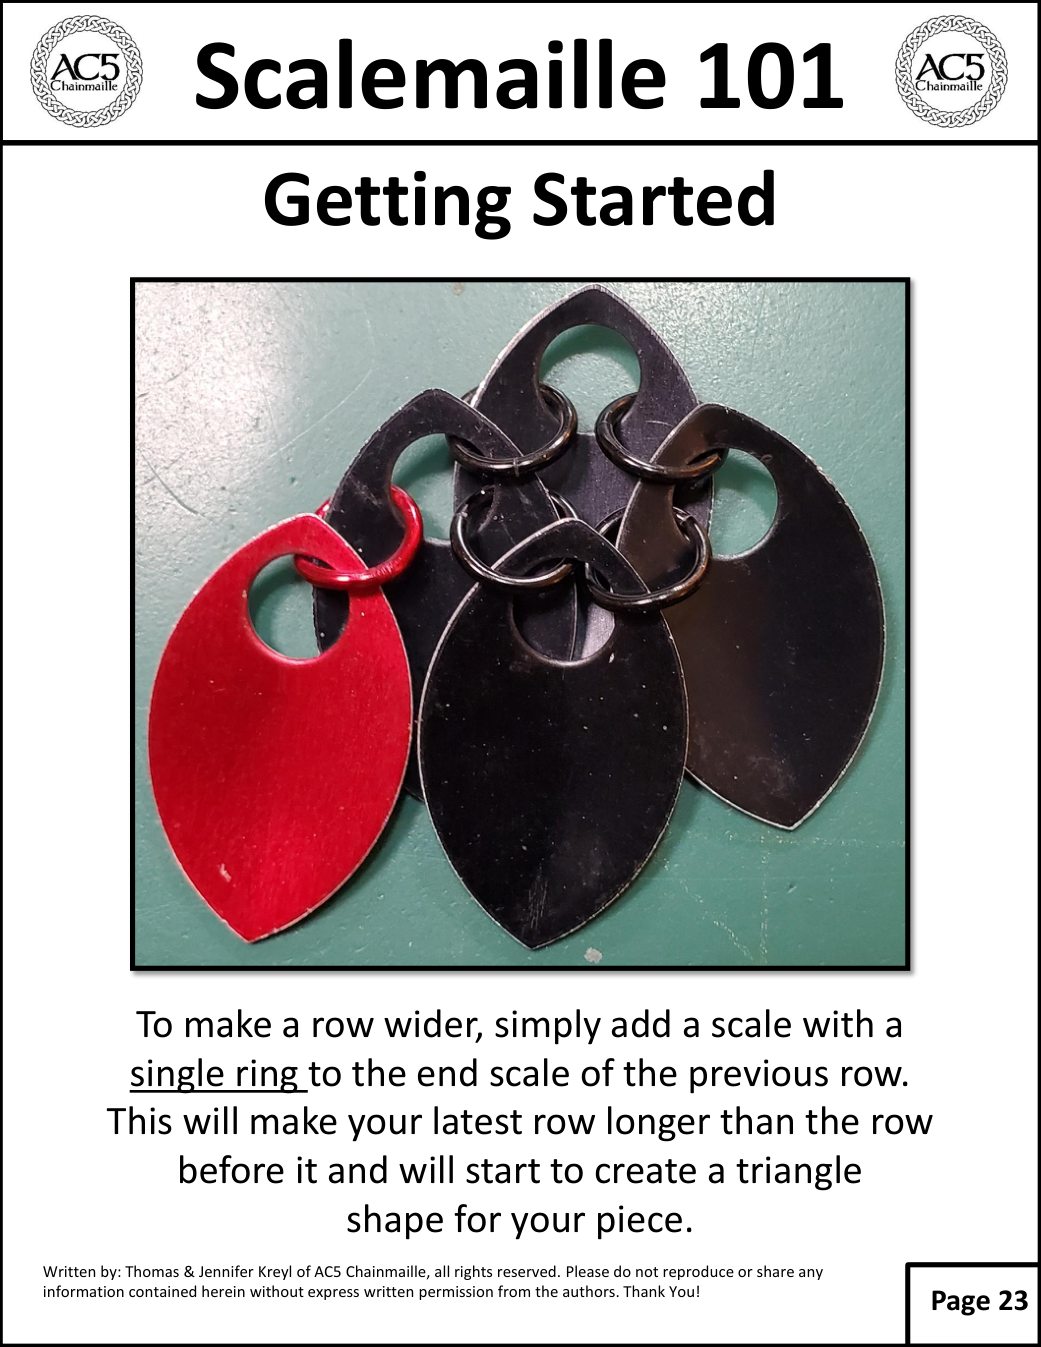
Getting Started To make a row wider, simply add a scale with a single ring to the end scale of the previous row. This will make your latest row longer than the row before it and will start to create a triangle shape for your piece.

Original tutorial · Page 24 of 37
Scalemaille 101 original illustrated instruction page 24
Read searchable text for page 24

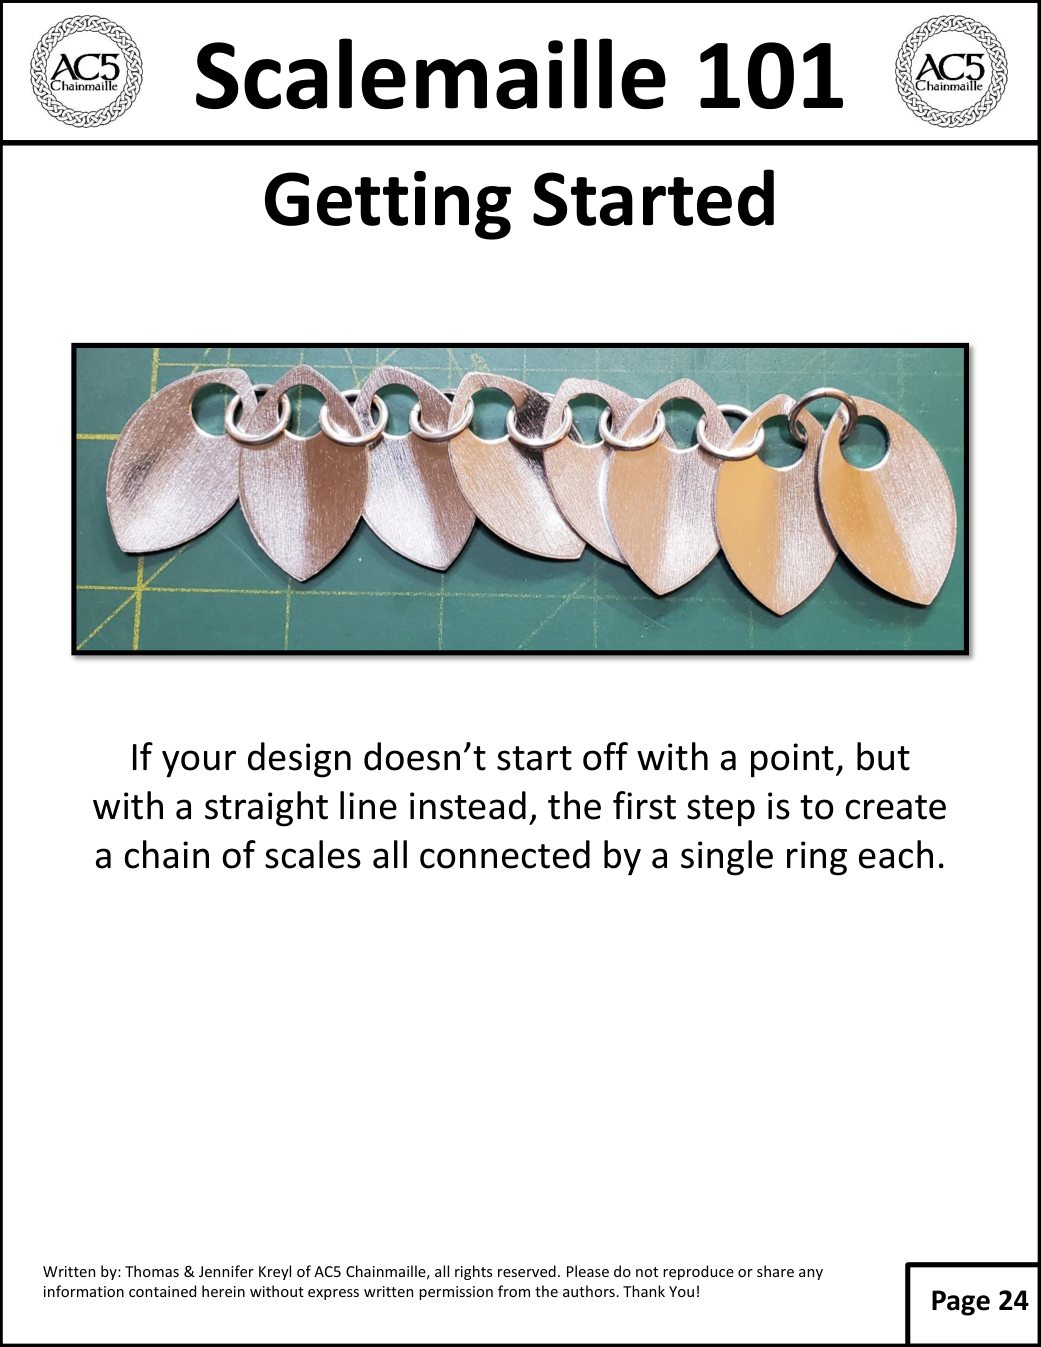
Getting Started If your design doesn’t start off with a point, but with a straight line instead, the first step is to create a chain of scales all connected by a single ring each.

Original tutorial · Page 25 of 37
Scalemaille 101 original illustrated instruction page 25
Read searchable text for page 25

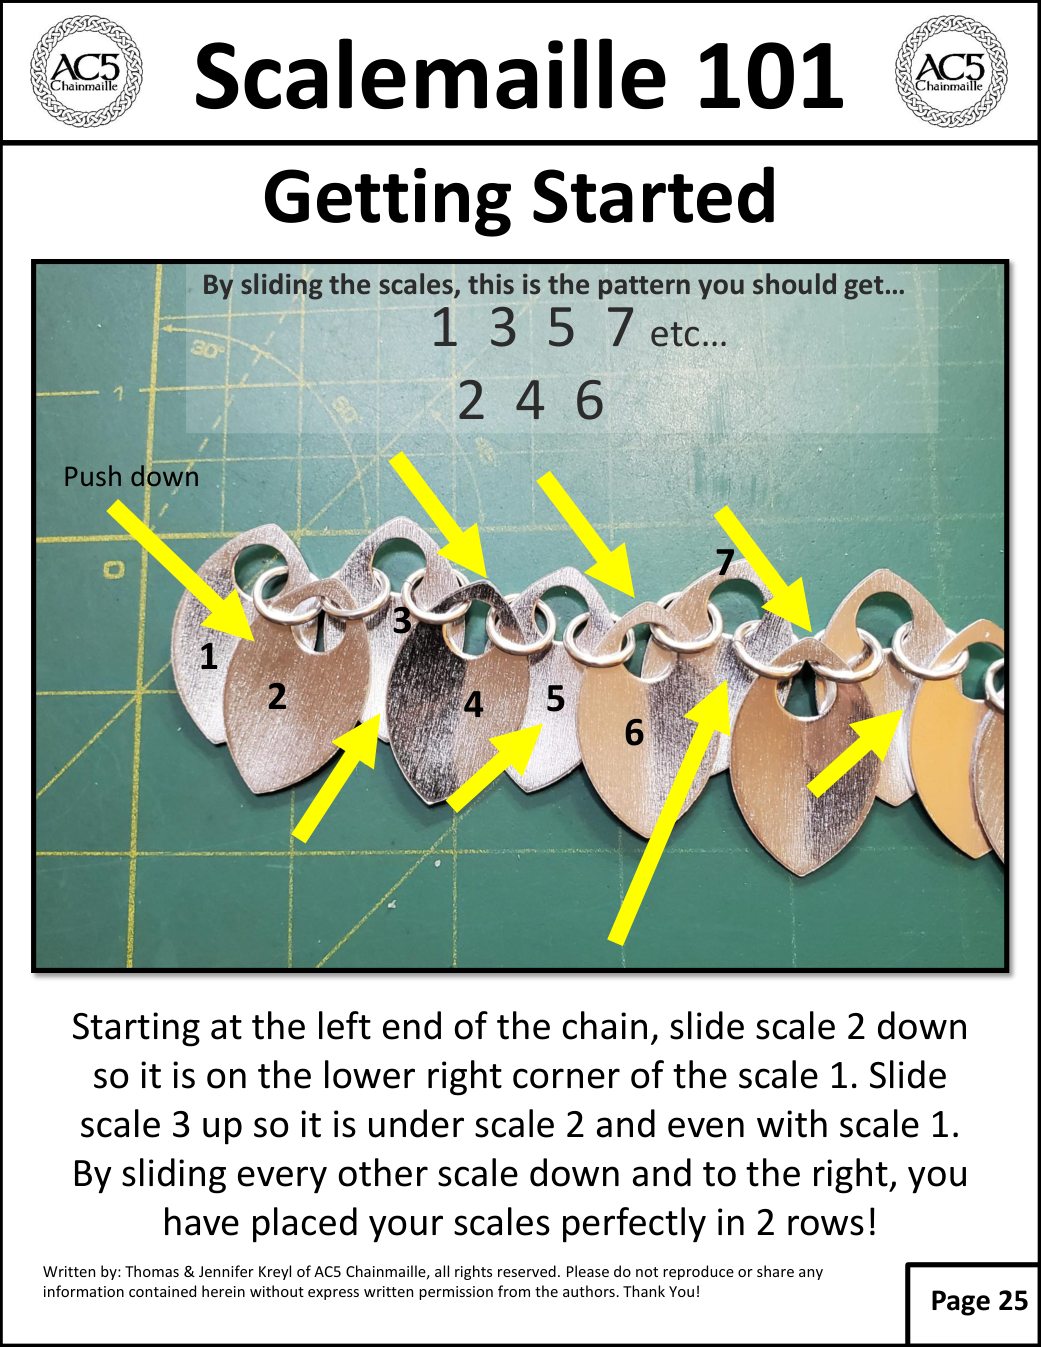
Getting Started By sliding the scales, this is the pattern you should get… 1 3 5 7 etc… 2 4 6 Push down 7 3 2 1 4 5 6 Starting at the left end of the chain, slide scale 2 down so it is on the lower right corner of the scale 1. Slide scale 3 up so it is under scale 2 and even with scale 1. By sliding every other scale down and to the right, you have placed your scales perfectly in 2 rows!

Original tutorial · Page 26 of 37
Scalemaille 101 original illustrated instruction page 26
Read searchable text for page 26

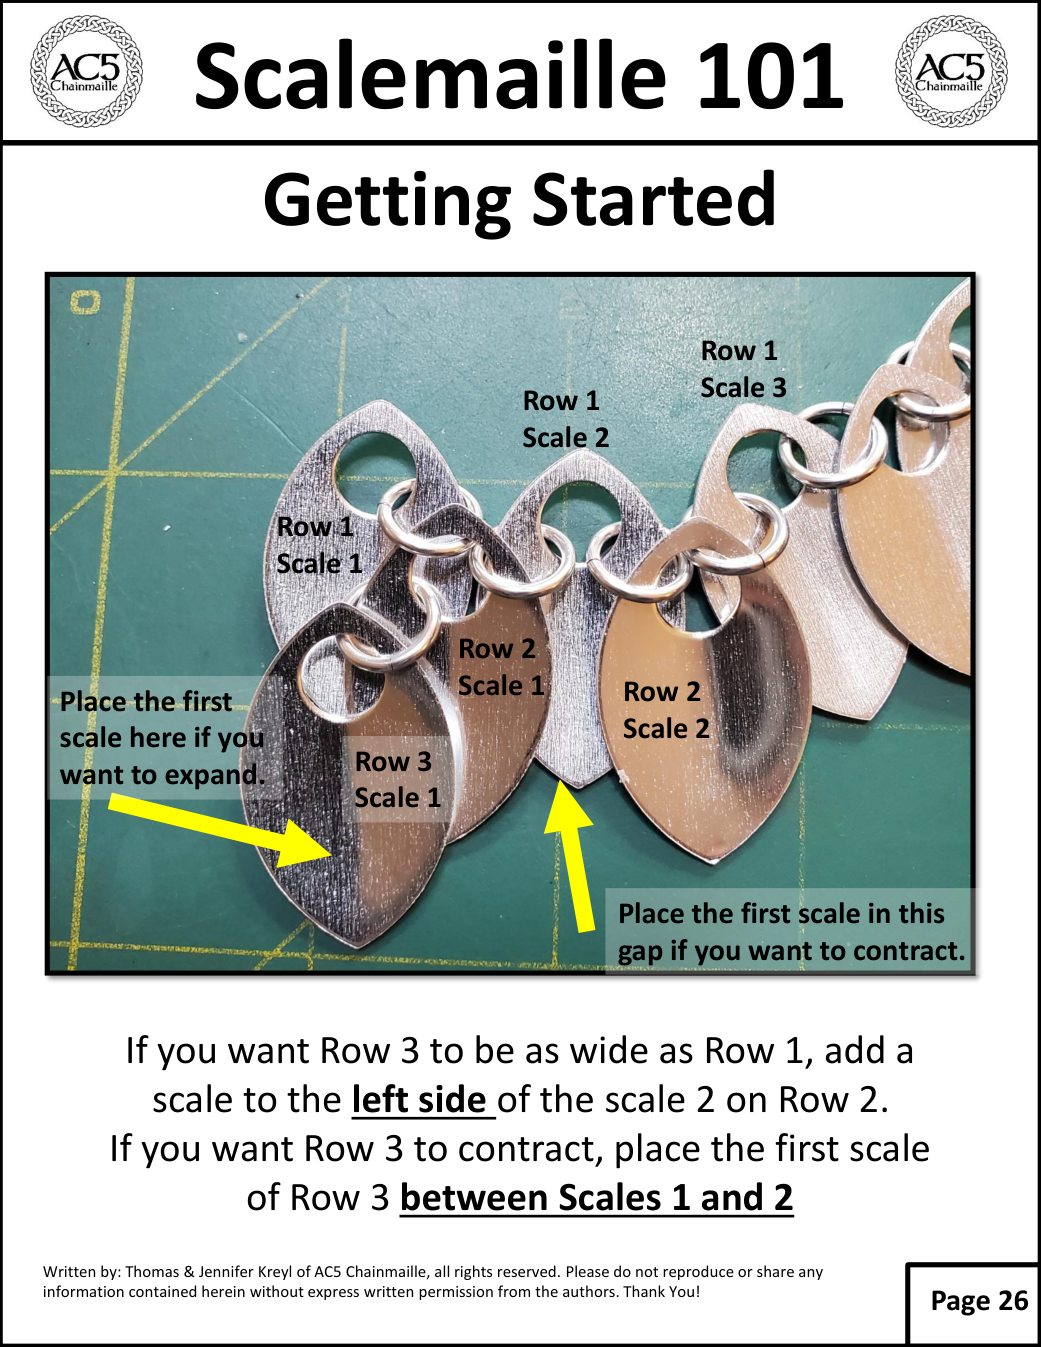
Getting Started Row 1 Scale 3 Row 1 Scale 2 Row 1 Scale 1 Row 2 Scale 1 Place the first scale here if you want to expand. Row 2 Scale 2 Row 3 Scale 1 Place the first scale in this gap if you want to contract. If you want Row 3 to be as wide as Row 1, add a scale to the left side of the scale 2 on Row 2. If you want Row 3 to contract, place the first scale of Row 3 between Scales 1 and 2

Original tutorial · Page 27 of 37
Scalemaille 101 original illustrated instruction page 27
Read searchable text for page 27

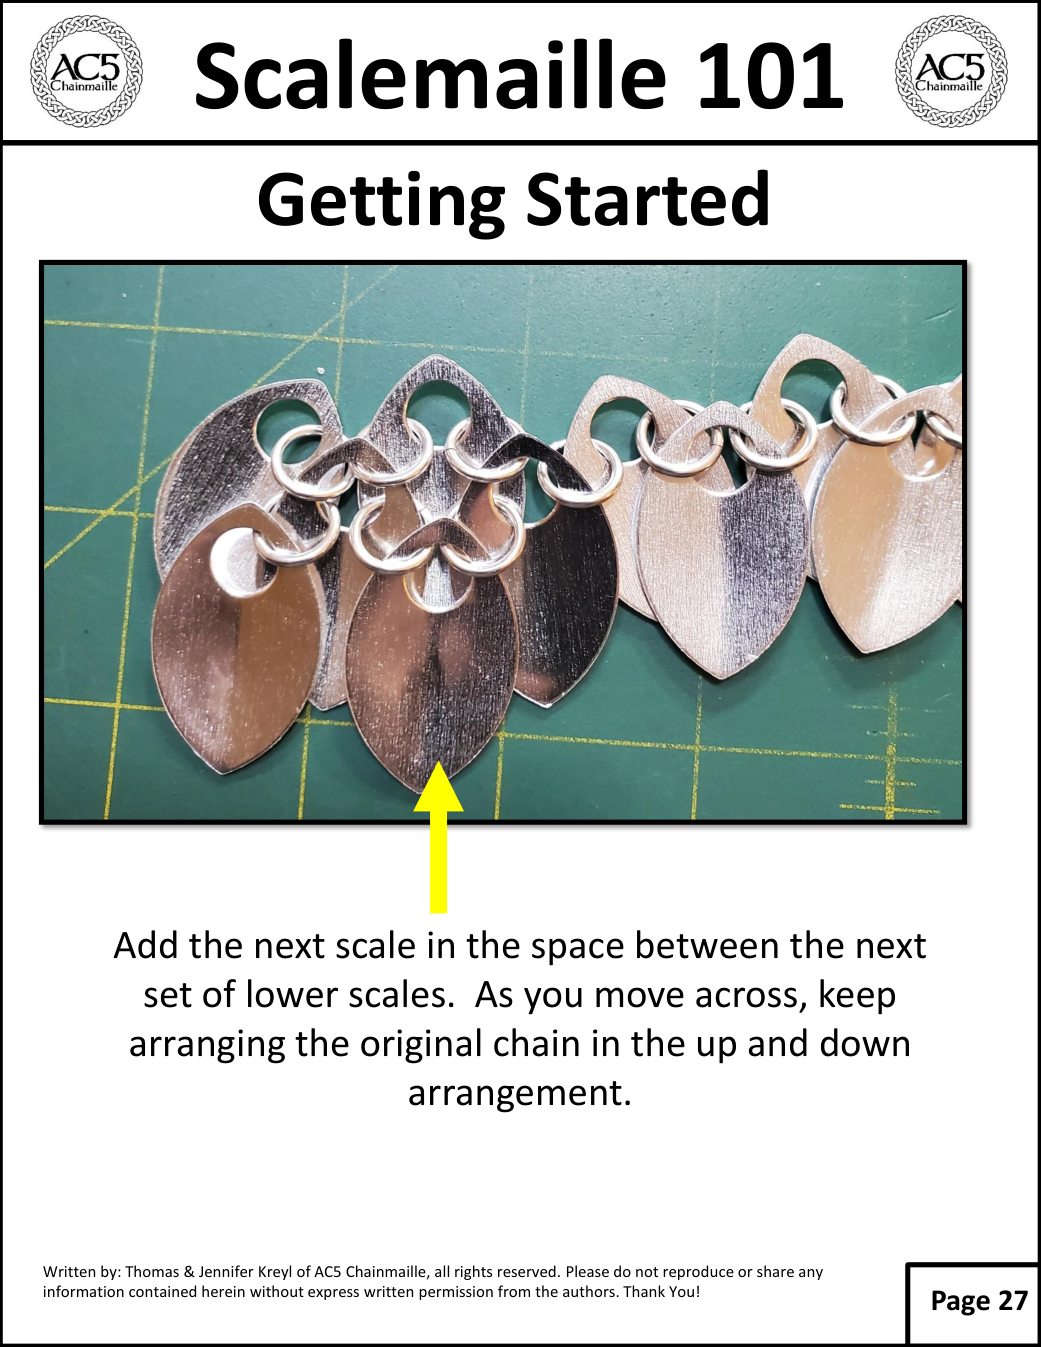
Getting Started Add the next scale in the space between the next set of lower scales. As you move across, keep arranging the original chain in the up and down arrangement.

Original tutorial · Page 28 of 37
Scalemaille 101 original illustrated instruction page 28
Read searchable text for page 28

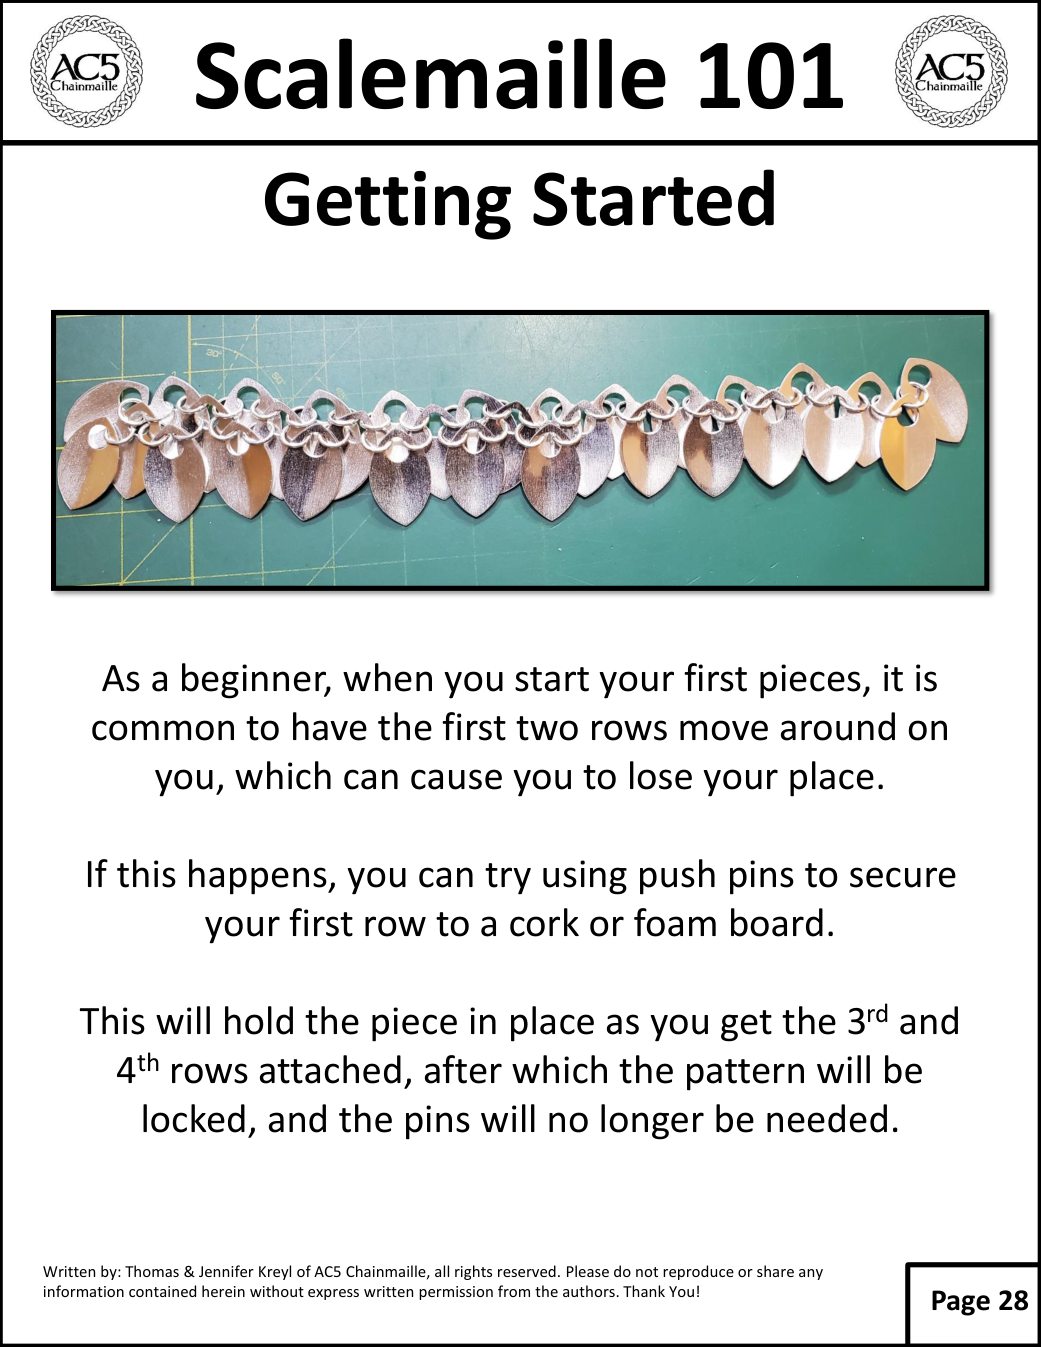
Getting Started As a beginner, when you start your first pieces, it is common to have the first two rows move around on you, which can cause you to lose your place. If this happens, you can try using push pins to secure your first row to a cork or foam board. This will hold the piece in place as you get the 3rd and 4th rows attached, after which the pattern will be locked, and the pins will no longer be needed.

↑ Back to tutorial contents

Design Considerations

Original tutorial · Page 29 of 37
Scalemaille 101 original illustrated instruction page 29
Read searchable text for page 29

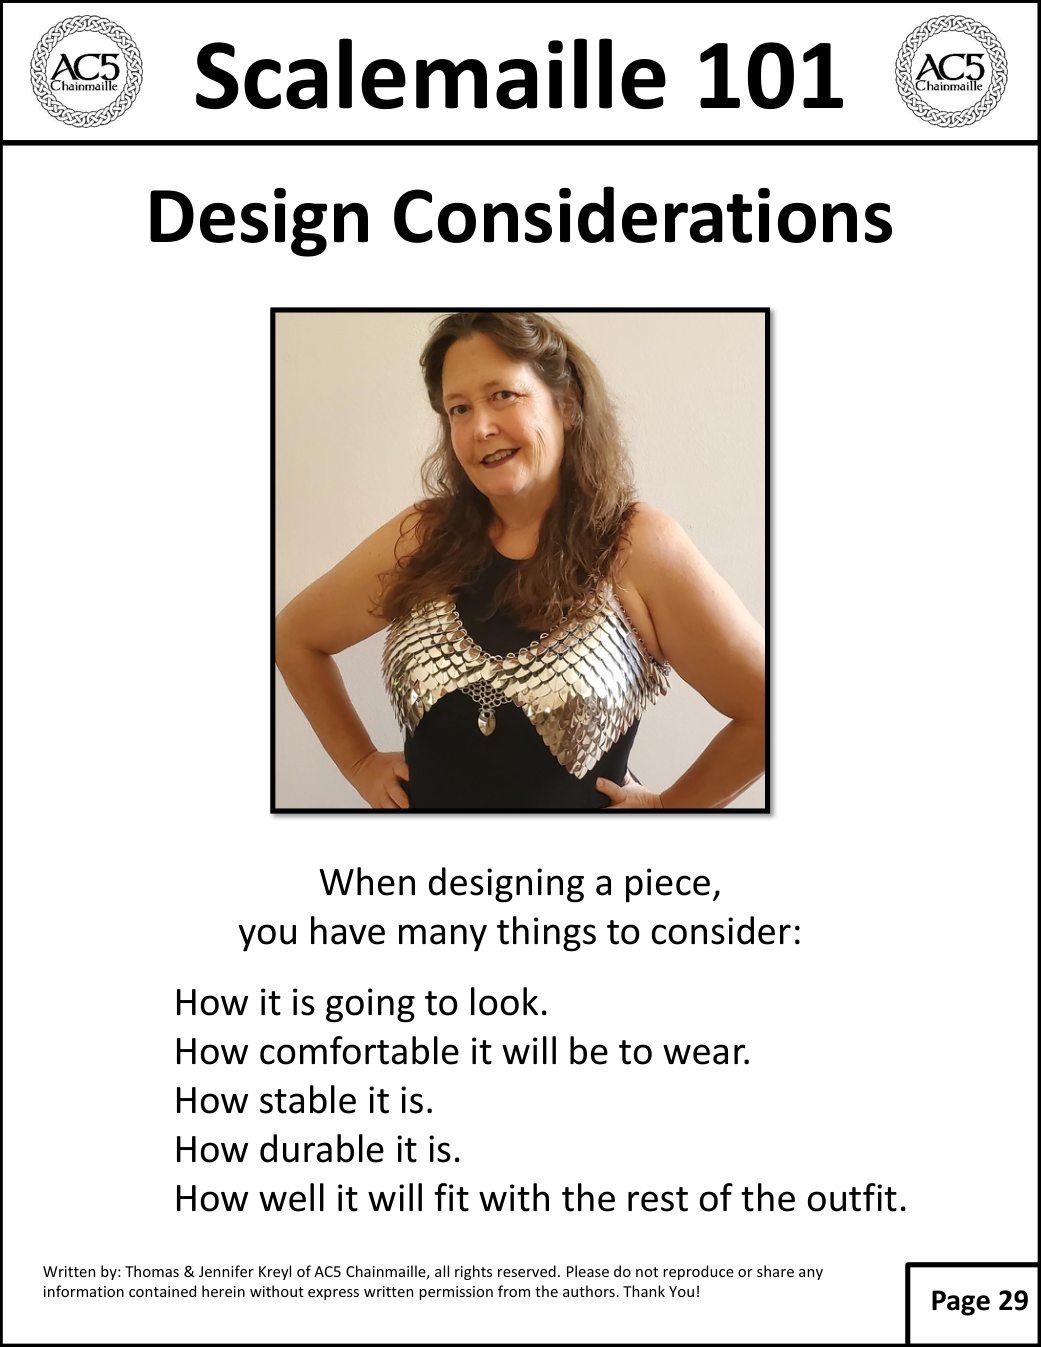
Design Considerations When designing a piece, you have many things to consider: How it is going to look. How comfortable it will be to wear. How stable it is. How durable it is. How well it will fit with the rest of the outfit.

Original tutorial · Page 30 of 37
Scalemaille 101 original illustrated instruction page 30
Read searchable text for page 30

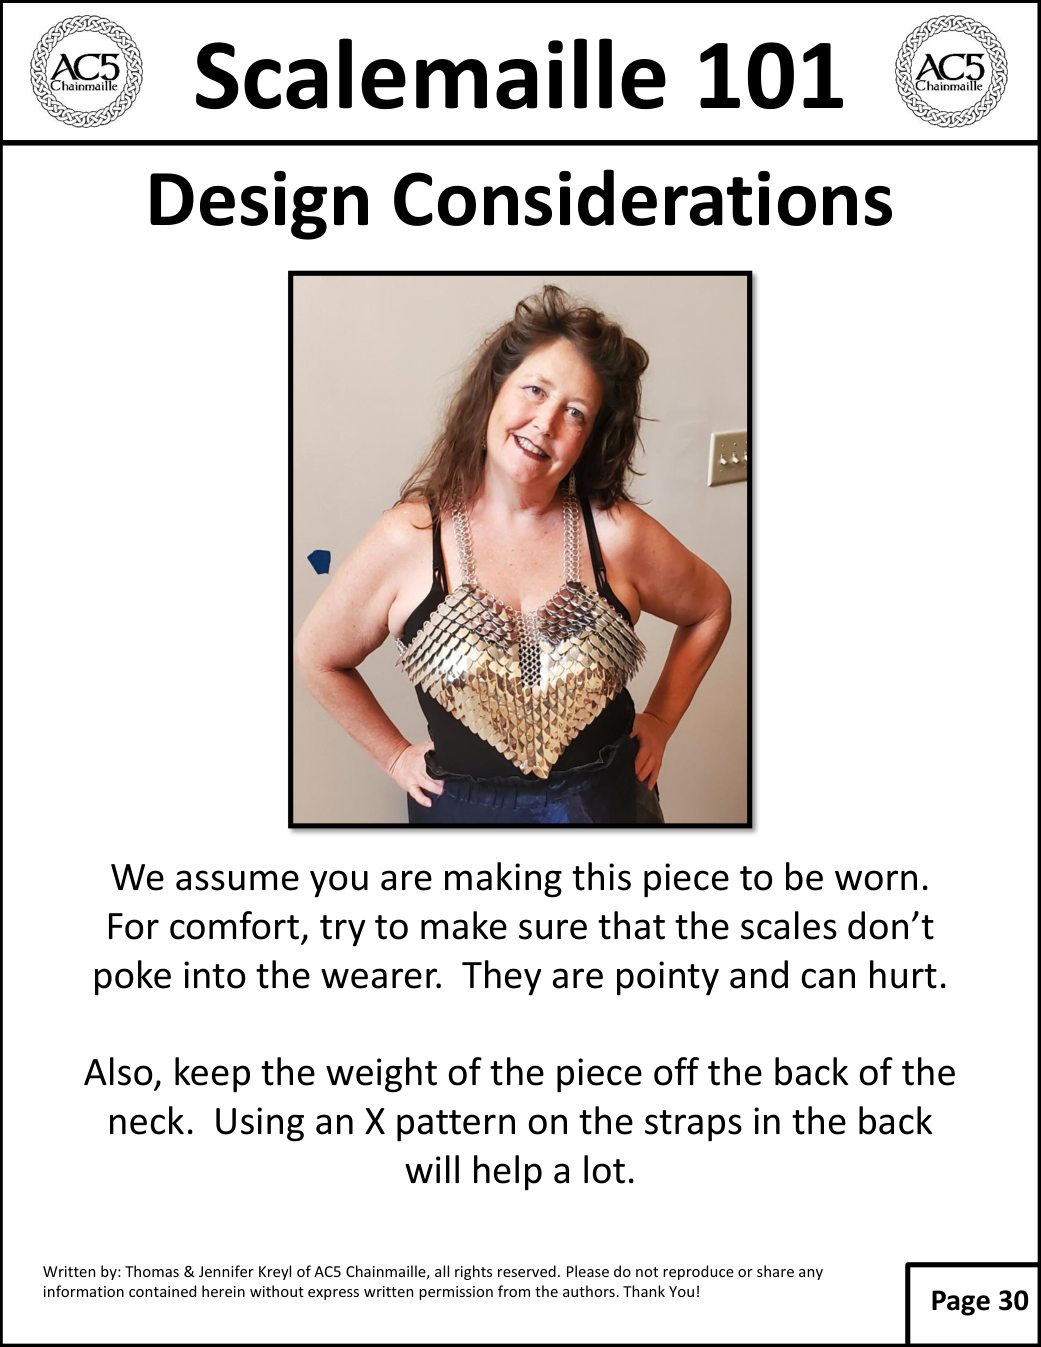
Design Considerations We assume you are making this piece to be worn. For comfort, try to make sure that the scales don’t poke into the wearer. They are pointy and can hurt. Also, keep the weight of the piece off the back of the neck. Using an X pattern on the straps in the back will help a lot.

Original tutorial · Page 31 of 37
Scalemaille 101 original illustrated instruction page 31
Read searchable text for page 31

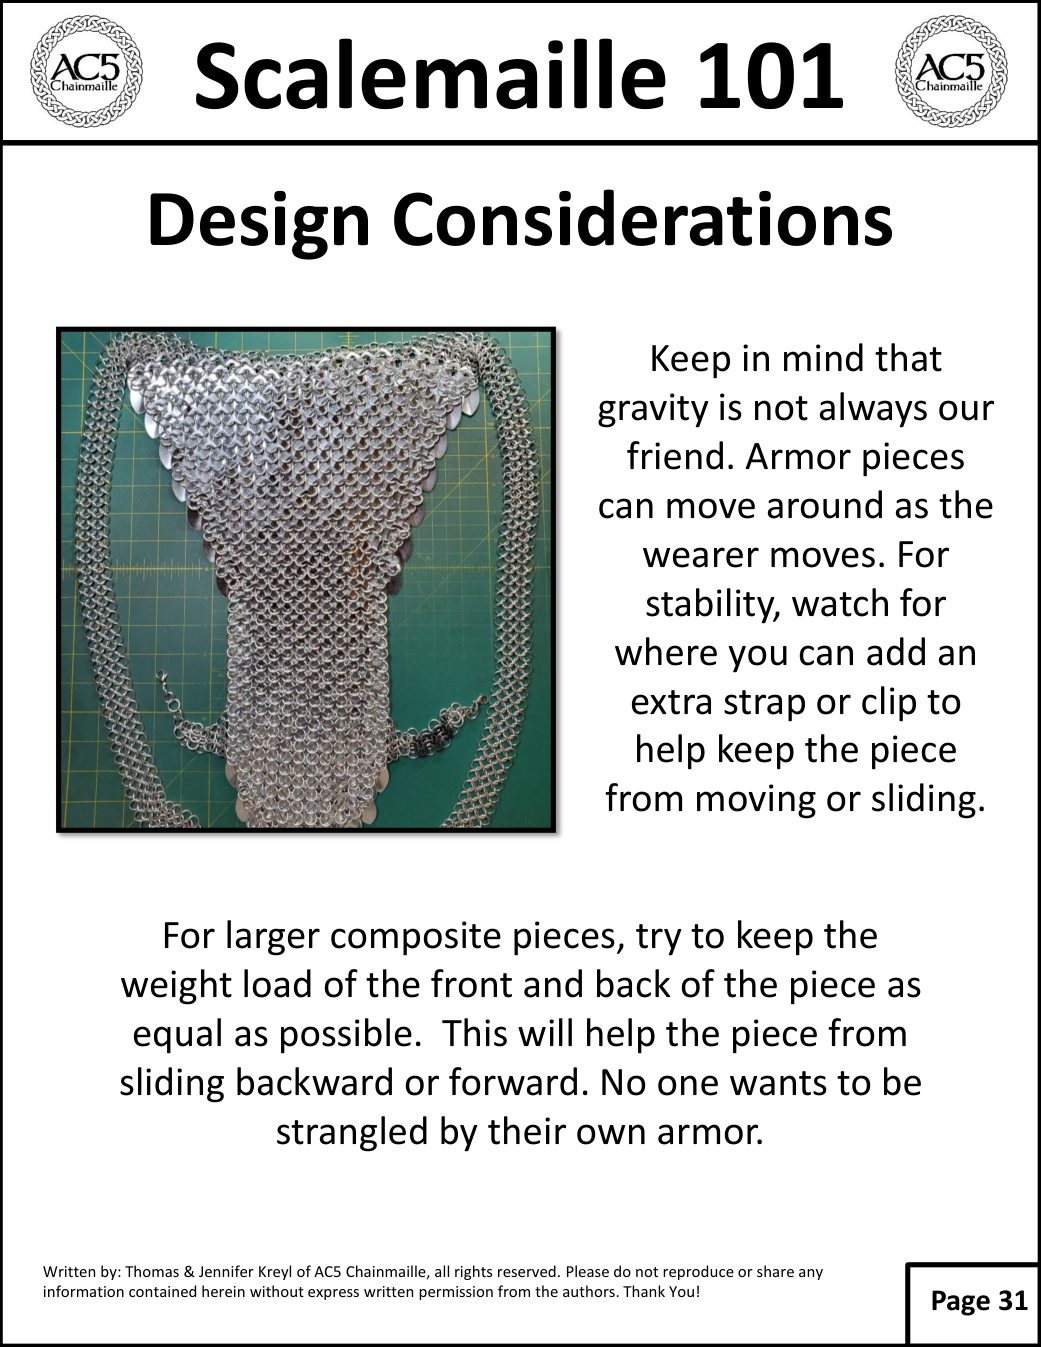
Design Considerations Keep in mind that gravity is not always our friend. Armor pieces can move around as the wearer moves. For stability, watch for where you can add an extra strap or clip to help keep the piece from moving or sliding. For larger composite pieces, try to keep the weight load of the front and back of the piece as equal as possible. This will help the piece from sliding backward or forward. No one wants to be strangled by their own armor.

Original tutorial · Page 32 of 37
Scalemaille 101 original illustrated instruction page 32
Read searchable text for page 32

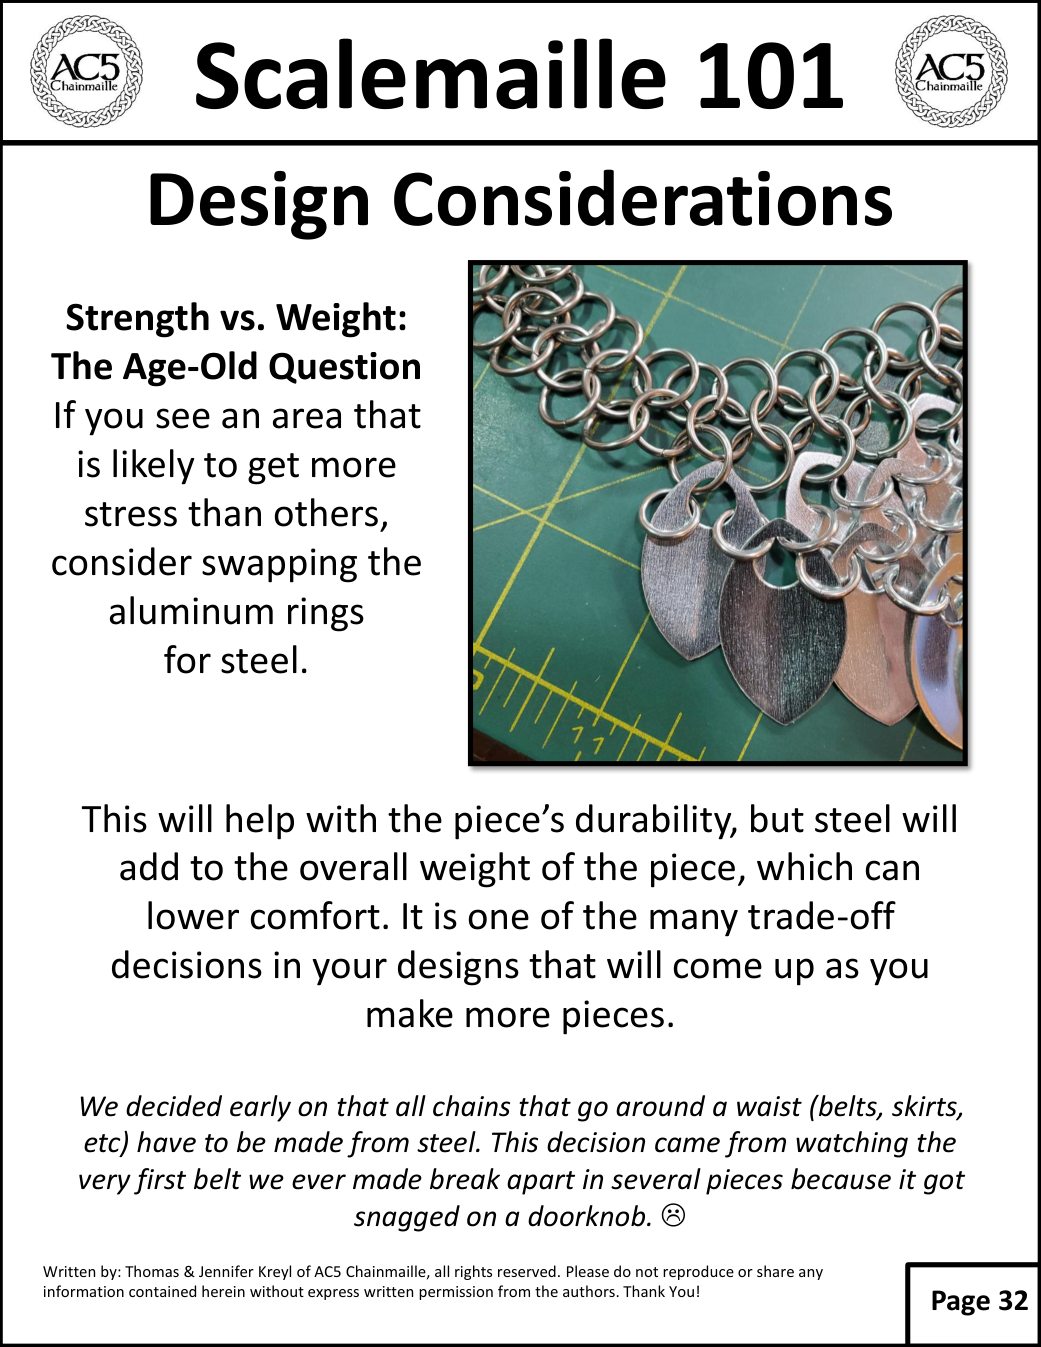
Design Considerations Strength vs. Weight: The Age-Old Question If you see an area that is likely to get more stress than others, consider swapping the aluminum rings for steel. This will help with the piece’s durability, but steel will add to the overall weight of the piece, which can lower comfort. It is one of the many trade-off decisions in your designs that will come up as you make more pieces. We decided early on that all chains that go around a waist (belts, skirts, etc) have to be made from steel. This decision came from watching the very first belt we ever made break apart in several pieces because it got snagged on a doorknob. 

Original tutorial · Page 33 of 37
Scalemaille 101 original illustrated instruction page 33
Read searchable text for page 33

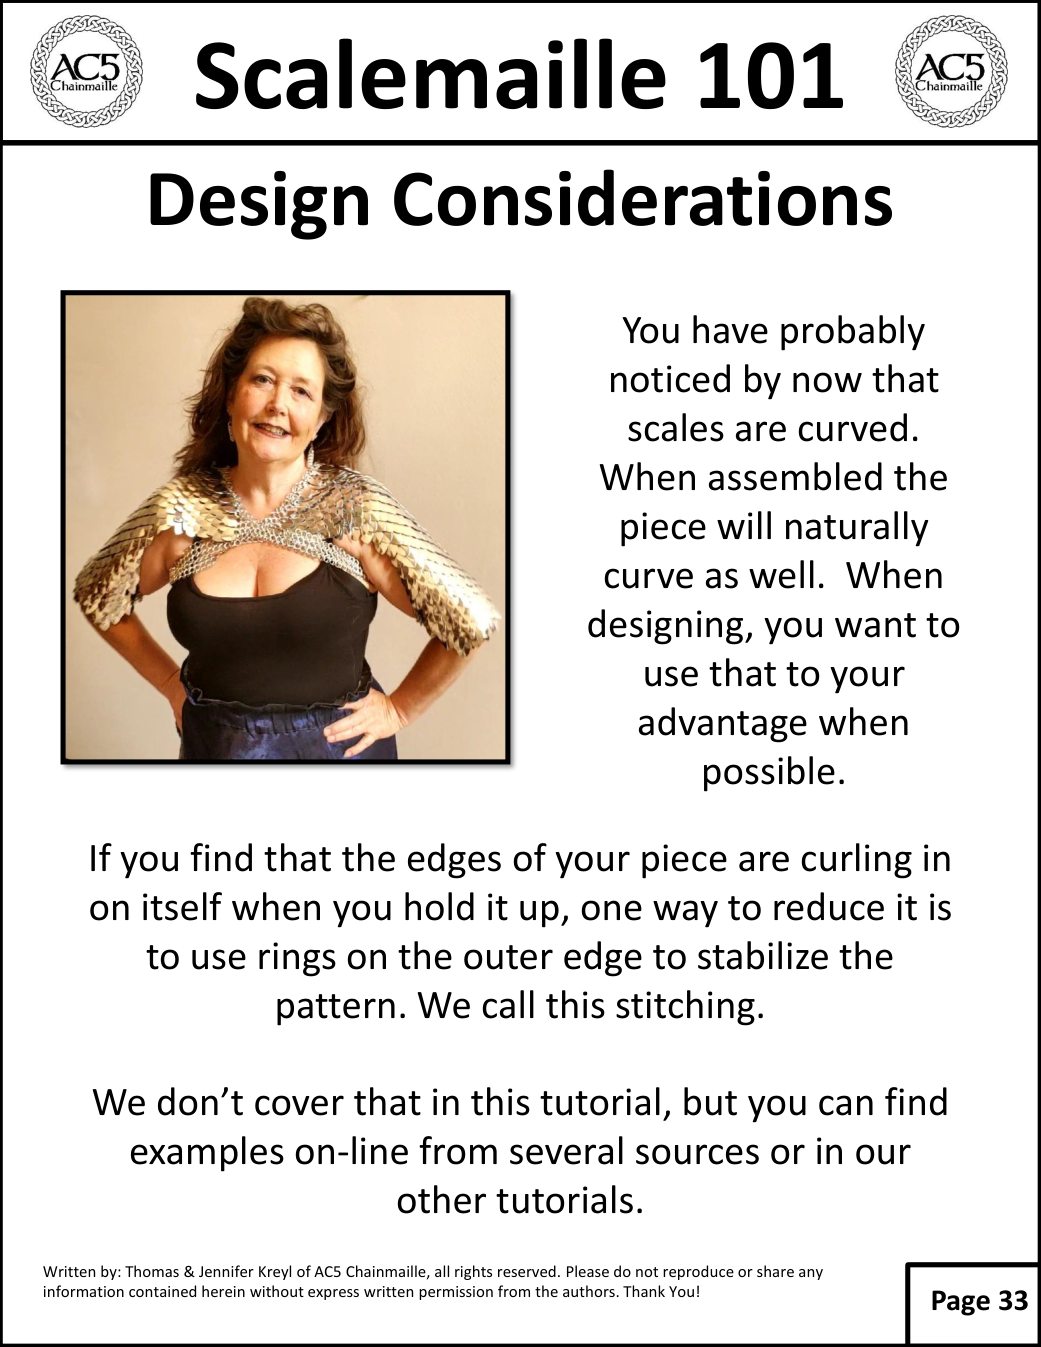
Design Considerations You have probably noticed by now that scales are curved. When assembled the piece will naturally curve as well. When designing, you want to use that to your advantage when possible. If you find that the edges of your piece are curling in on itself when you hold it up, one way to reduce it is to use rings on the outer edge to stabilize the pattern. We call this stitching. We don’t cover that in this tutorial, but you can find examples on-line from several sources or in our other tutorials.

↑ Back to tutorial contents

Advanced Techniques

Original tutorial · Page 34 of 37
Scalemaille 101 original illustrated instruction page 34
Read searchable text for page 34

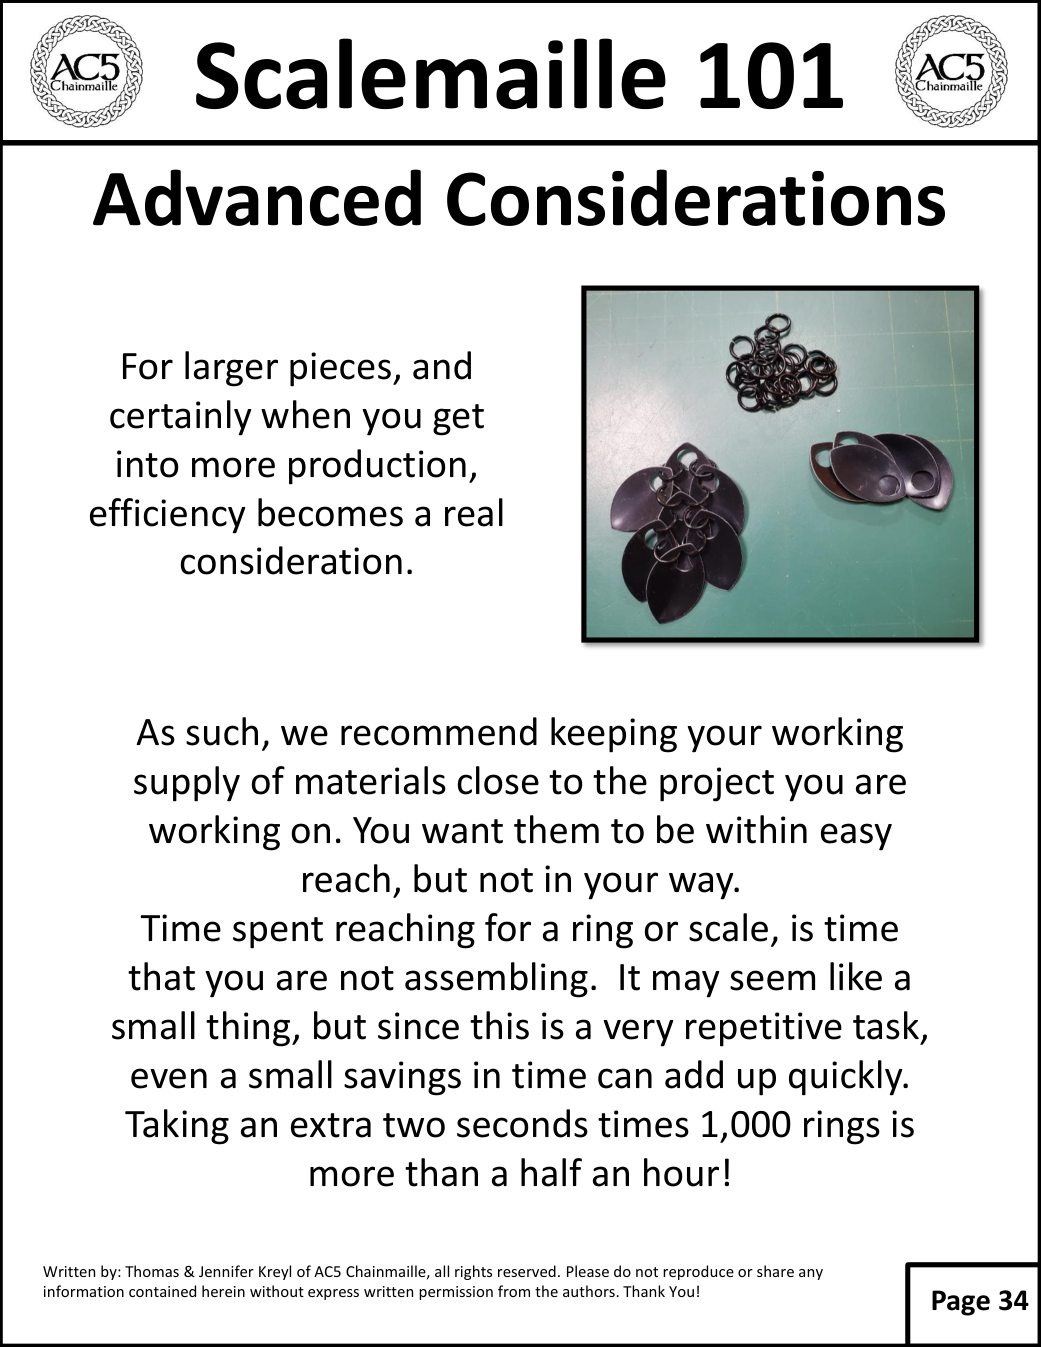
Advanced Considerations For larger pieces, and certainly when you get into more production, efficiency becomes a real consideration. As such, we recommend keeping your working supply of materials close to the project you are working on. You want them to be within easy reach, but not in your way. Time spent reaching for a ring or scale, is time that you are not assembling. It may seem like a small thing, but since this is a very repetitive task, even a small savings in time can add up quickly. Taking an extra two seconds times 1,000 rings is more than a half an hour!

Original tutorial · Page 35 of 37
Scalemaille 101 original illustrated instruction page 35
Read searchable text for page 35

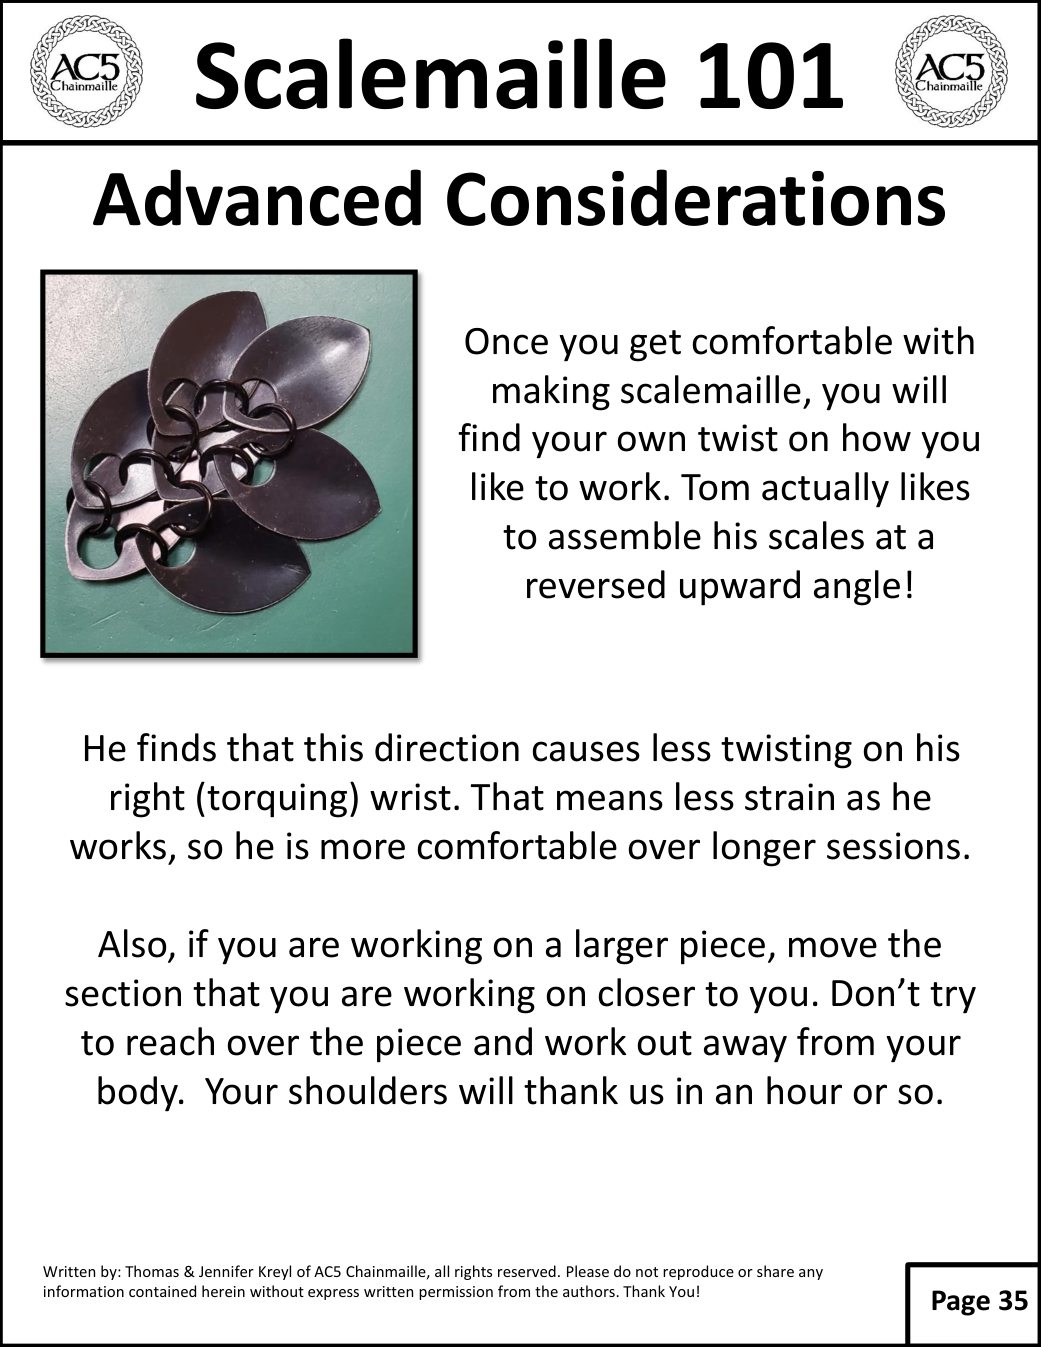
Advanced Considerations Once you get comfortable with making scalemaille, you will find your own twist on how you like to work. Tom actually likes to assemble his scales at a reversed upward angle! He finds that this direction causes less twisting on his right (torquing) wrist. That means less strain as he works, so he is more comfortable over longer sessions. Also, if you are working on a larger piece, move the section that you are working on closer to you. Don’t try to reach over the piece and work out away from your body. Your shoulders will thank us in an hour or so.

Original tutorial · Page 36 of 37
Scalemaille 101 original illustrated instruction page 36
Read searchable text for page 36

Advanced Considerations Listen to your body and take frequent breaks. Stop before everything begins to hurt, not afterwards. By then it is too late. You can do real damage to yourself if you go too long without taking the proper care of your hands and wrists. Find stretches for your hands and wrists on a regular basis. To get a break from the chainmaille tables, we actively look for activities that work our muscles in other ways. We like to play disc golf, as it uses the wrist and hands in a different direction than making chainmaille. (and is relatively cheap once you own the discs.) ☺ Most importantly, have fun while you are doing this. It can be a great creative outlet, and you can create some amazing pieces.

Original tutorial · Page 37 of 37
Scalemaille 101 original illustrated instruction page 37
Read searchable text for page 37

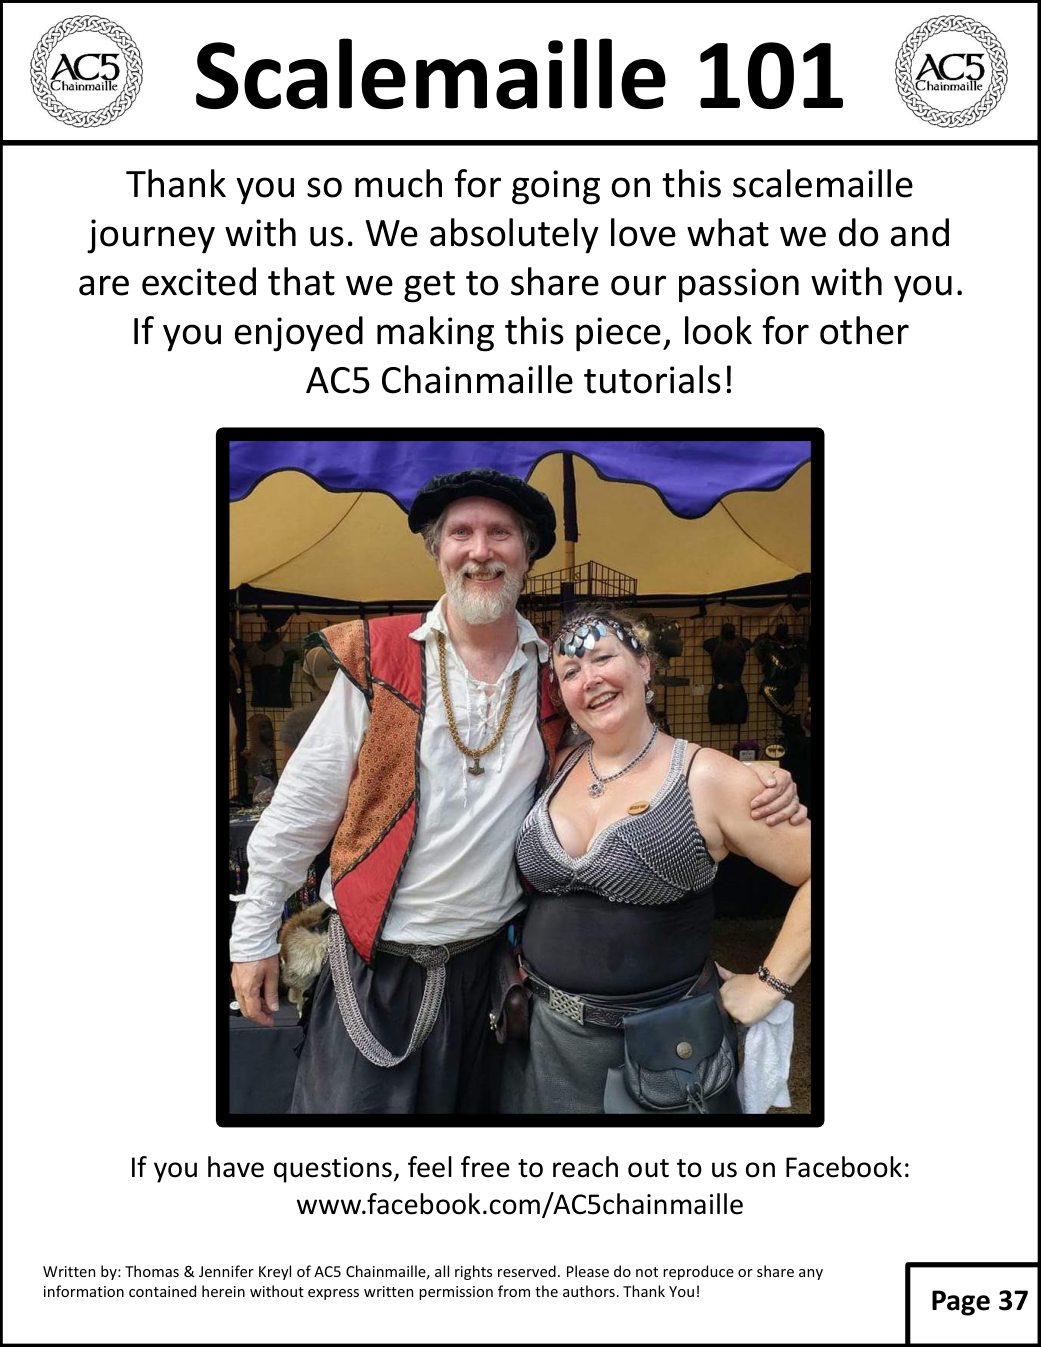
Thank you so much for going on this scalemaille journey with us. We absolutely love what we do and are excited that we get to share our passion with you. If you enjoyed making this piece, look for other AC5 Chainmaille tutorials! If you have questions, feel free to reach out to us on Facebook: www.facebook.com/AC5chainmaille

↑ Back to tutorial contents

Original 37-page PDF

Prefer the original document? Open it in a new tab or read it below.

Open original PDF

Tutorial © Thomas & Jennifer Kreyl, AC5 Chainmaille. Reproduced with permission by The Ring Lord. Original page layouts and credits retained.